Stainless Hardness Chart: HRB, HB, HV Explained
Are you struggling to decipher the differences between stainless steel hardness scales1? This confusion can lead to material selection errors, causing project delays and unforeseen costs. By understanding the nuances of HRB, HB, and HV, you can ensure your materials meet exact specifications for optimal performance and longevity.
Stainless steel hardness is a critical measure of its resistance to localized plastic deformation, such as scratching or indentation. The three primary scales—Rockwell (HRB), Brinell (HB), and Vickers (HV)—quantify this property, which directly impacts the material's machinability, wear resistance, and suitability for various applications.
Choosing the right stainless steel is more than just picking a grade; it's about matching precise mechanical properties to your application's demands. Hardness is arguably one of the most critical yet misunderstood of these properties. In my years at MFY, I've seen how a small discrepancy in a hardness value can cascade into significant production or structural issues. This guide is designed to demystify these crucial metrics for you.
At MFY, we believe that empowering our clients with knowledge is the first step toward building a resilient and efficient supply chain. The choice between HRB, HB, and HV isn't merely academic—it's a practical decision with real-world consequences for your project's budget, timeline, and final quality. A deeper dive into these scales reveals that each tells a different story about the material's character. For instance, a hardness value appropriate for a decorative panel would be wholly inadequate for a high-wear industrial component. By appreciating these distinctions, you move from simply procuring steel to strategically engineering success. We'll explore this through industry examples to make the concepts tangible.
What is the importance of hardness measurement in stainless steel?
Ever specified a stainless steel grade only to find it fails prematurely under stress? This often stems from overlooking hardness, a key predictor of durability. Neglecting this crucial metric can compromise the structural integrity and safety of your entire project, leading to costly rework and reputational damage.
Hardness measurement is vital for stainless steel as it determines its resistance to wear, abrasion, and deformation. This single metric directly influences the material's tensile strength, formability, and machinability, making it a cornerstone for ensuring product quality, safety, and long-term performance in its intended environment.
The significance of hardness testing transcends a simple number on a spec sheet; it's the foundation of material reliability. In my role at MFY, I once worked with a construction contractor in Southeast Asia building a coastal bridge. They initially focused only on the corrosion resistance of 316L stainless steel for the rebar and fixtures, overlooking the abrasive effects of wind-blown sand and debris. Their initial samples showed high susceptibility to surface scratching, which could compromise the passive layer that protects the steel from chlorides. By introducing a specific hardness requirement, we helped them source a material that not only resisted corrosion but also had the durability to withstand the harsh, abrasive environment. This experience was a powerful reminder that hardness is not an isolated property but an integral part of a holistic material strategy. It dictates how the material will behave during fabrication and its ability to endure its service life. Understanding its importance is the first step toward preventing failures and optimizing performance. We will now explore this in greater detail, breaking down how this single property impacts everything from safety to manufacturing efficiency.
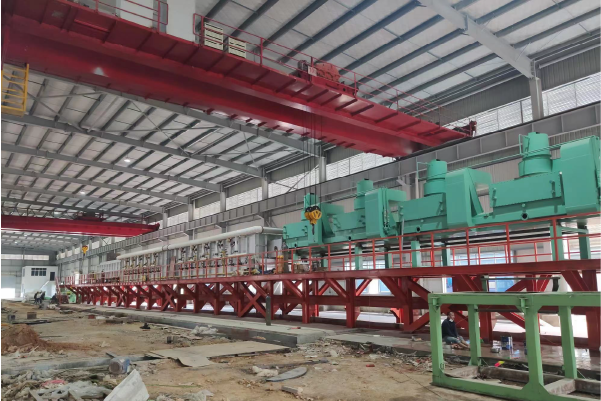
The true value of hardness measurement lies in its predictive power across a product's lifecycle, from manufacturing to end-of-life. It serves as a primary indicator for several other mechanical properties, making it an efficient and cost-effective quality control tool. For engineers, contractors, and manufacturers, a clear understanding of hardness provides a layer of assurance that the selected material will perform as designed. This isn't just about meeting a standard; it's about building robust, reliable, and safe products. The implications are far-reaching, influencing everything from the safety of public infrastructure to the efficiency of a manufacturing assembly line. In our global operations, we’ve seen firsthand how a disciplined approach to hardness specification separates the most successful projects from those that struggle with performance and budget issues. This discipline starts with appreciating the multifaceted role that hardness plays in material science and engineering.
Ensuring Structural Integrity and Safety
At its core, hardness is intrinsically linked to a material's tensile strength. While not a direct 1:1 relationship, a higher hardness value generally indicates greater strength, meaning the material can withstand higher loads before deforming or fracturing. This correlation is fundamental in structural applications. Consider the load-bearing components in a commercial building or the critical parts in industrial machinery. A failure in these components isn't just an inconvenience; it can be catastrophic. I recall a case involving an equipment integrator for the mining industry. They were manufacturing conveyor belt rollers that were failing much faster than expected. An investigation revealed that their supplier had provided stainless steel with a hardness value at the lowest end of the acceptable range. While it technically met the grade's specification, it lacked the necessary toughness to handle the constant impact and abrasion from raw ore. By specifying a narrower, higher hardness range for their subsequent orders with MFY, they were able to dramatically increase the rollers' service life, enhancing both safety and operational uptime. This demonstrates that hardness isn't just a passive property; it's an active agent in ensuring safety and structural reliability.
Furthermore, wear resistance is a direct function of surface hardness. For components subjected to friction, erosion, or abrasion, a harder surface is paramount. Think of stainless steel pipes transporting abrasive slurries in a processing plant or the blades in an industrial mixer. In these scenarios, a soft material will quickly erode, thinning the component walls and eventually leading to leaks or failures. We worked with a client in the Middle East who manufactures components for desalination plants. The combination of high-pressure saltwater and fine particulate matter was causing severe erosion in their valve systems. By shifting from a standard 316L to a duplex stainless steel with a significantly higher hardness and strength, they not only improved corrosion resistance but also massively extended the components' operational lifespan. This shift was guided entirely by an analysis of the wear patterns and a strategic decision to prioritize hardness as a key performance indicator.
The process of specifying hardness, therefore, becomes a critical risk management activity. It's a proactive measure to prevent field failures. By mapping the environmental and mechanical stresses a component will face, an engineer can define a target hardness value that provides a robust safety margin. This is why at MFY, our technical consultations always begin with a deep dive into the application's environment. We don't just sell steel; we help our clients build a specification that guarantees performance and safety. This collaborative approach ensures that the material's properties, with hardness at the forefront, are perfectly aligned with the real-world challenges the product will face.
Optimizing Manufacturing and Machinability
The hardness of stainless steel has a profound impact on its behavior during fabrication. A material that is too hard can be difficult to cut, bend, or form, leading to increased tool wear, slower production cycles, and higher energy consumption. Conversely, a material that is too soft may not hold its shape after forming or may result in poor surface finishes during machining. Finding the right hardness balance is key to manufacturing efficiency. A classic example comes from a client of ours, a large-scale manufacturer of kitchen appliances. They were struggling with inconsistent results when deep-drawing stainless steel sheets to form sinks. Some batches would form perfectly, while others would crack or develop surface defects. Our analysis revealed significant hardness variations in the raw material they were sourcing. The harder coils were brittle and prone to cracking under the strain of the press, while the softer ones couldn't achieve the sharp, clean lines their design required. By implementing a strict hardness tolerance for their incoming 304 stainless steel coils, we provided them with the consistency they needed to stabilize their production process, reduce scrap rates, and improve the final product's quality.
This relationship between hardness and formability is critical. Harder materials resist changes in shape, requiring more force and more robust tooling. Softer materials are more ductile and can be shaped more easily, but they may be more susceptible to tearing or wrinkling if not properly supported. The choice of hardness must be a deliberate compromise between the desired final properties and the practicalities of the manufacturing process. A fabricator needs to know the material's hardness to set the correct parameters on their machines—be it a press brake, a laser cutter, or a CNC mill.
To illustrate this point, consider the machinability of different stainless steels. Machinability is often inversely proportional to hardness and toughness. Here is a simplified table showing how hardness can influence machining parameters for a common grade like 304 stainless steel.
| Hardness (HRB) | Machinability Rating | Typical Application | Machining Approach |
|---|---|---|---|
| 70-75 | Good | Decorative panels, low-stress applications | Higher speeds, standard tooling |
| 80-85 | Moderate | Kitchen sinks, architectural fittings | Moderate speeds, requires good lubrication |
| 90-95 | Difficult | High-wear components, some fasteners | Slower speeds, rigid machine setup, specialized tool coatings |
| >95 | Very Difficult | Special-purpose hardened parts | Very slow speeds, frequent tool changes, advanced cooling |
This table highlights the direct operational adjustments required based on material hardness. For a distributor or trader, providing this level of detail to their clients can be a significant value-add, helping the end-user avoid costly production trial-and-error. At MFY, we see our role as bridging this information gap, ensuring the material we supply is perfectly suited not just for its final application, but for the journey it takes to get there.
Predicting Long-Term Performance and Durability
ly, hardness is a powerful tool for predicting how a stainless steel product will fare over years of service. It provides crucial insights into its fatigue life and its ability to resist environmental degradation beyond simple corrosion. Fatigue failure, which occurs when a material breaks after repeated cycles of loading and unloading, is highly sensitive to surface hardness and finish. Microscopic scratches or indentations on a soft surface can become initiation points for fatigue cracks. A harder, more defect-free surface is inherently more resistant to this type of failure. This is why components subjected to vibration or cyclic stress, such as in automotive exhausts or rotating machinery, often have stringent hardness requirements. We once consulted for an engineering firm designing support hangers for a large network of industrial pipes. The constant vibration from the fluid flow was causing premature fatigue failure in the initial prototypes. The solution involved not only a design change but also a material specification change to a harder temper of stainless steel, which significantly improved the fatigue resistance of the hangers.
Beyond mechanical stress, hardness also plays a role in resisting long-term environmental wear. In many applications, stainless steel is chosen for its cleanability and hygienic properties, such as in food processing or pharmaceutical manufacturing. A harder surface is less prone to scratching during aggressive cleaning cycles. Scratches not only look bad but can also harbor bacteria, compromising sanitation. A client in the food processing industry faced this exact issue with their conveyor systems. The standard 304 stainless steel they were using was becoming scratched by abrasive food products and harsh cleaning tools. By transitioning to a harder grade, they were able to maintain a smoother, more hygienic surface for longer, reducing contamination risks and ensuring compliance with health regulations.
Ultimately, specifying the correct hardness is an investment in the product's entire lifecycle. It reduces the likelihood of premature failure, lowers maintenance and replacement costs, and ensures the product continues to perform its function safely and effectively for its intended lifespan. This long-term perspective is central to MFY's philosophy. We encourage our clients to think beyond the initial purchase price and consider the total cost of ownership. A slightly higher investment in a material with the optimal hardness can yield substantial savings and improved performance over the long run, protecting both the asset and the brand's reputation.
How are HRB, HB, and HV currently used in evaluating stainless steel hardness?
Faced with a technical data sheet littered with HRB, HB, and HV values2? It's easy to get lost in this alphabet soup of metrics. This ambiguity can lead to misinterpretation of material properties, resulting in the procurement of steel that doesn't align with your project's engineering requirements.
In practice, Rockwell B (HRB) is used for rapid, quality control testing of softer stainless steels like 304/316. Brinell (HB) is preferred for castings and forgings with coarse grain structures, while Vickers (HV) is used for precision testing of thin materials, welds, and very hard steels.
Each of these hardness scales operates on a different principle and is suited for specific material types and conditions. They are not directly interchangeable, and assuming they are is a common pitfall. I remember working with a distributor in Russia who had a client requesting material with a specific Vickers (HV) hardness, a standard they were familiar with from European schematics. However, the local mill primarily provided data in Rockwell (HRB). A simple conversion chart wasn't enough because the testing methods themselves have different implications. The Vickers test provides a highly localized reading, while the Rockwell test is faster but slightly less precise. We had to mediate, explaining the nuances of each test to ensure the material supplied would meet the performance expectations of the end-user, even if the reporting metric was different. This highlights the practical need to understand not just what the values are, but what the tests themselves represent. It’s about translating a number into a reliable prediction of performance, which is a critical service we provide at MFY.
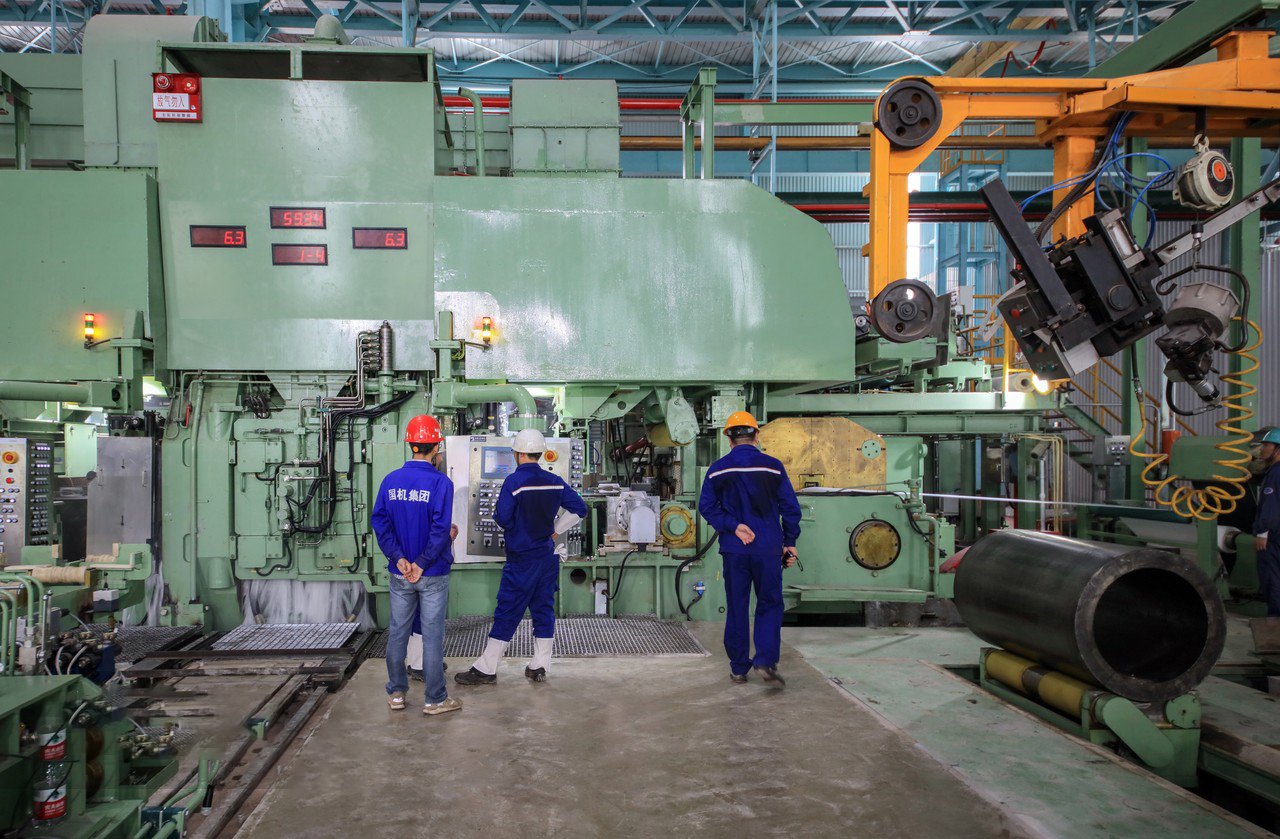
The application of HRB, HB, and HV in the stainless steel industry is a practical exercise in matching the right tool to the right job. The choice of testing method is driven by a combination of factors including the material's expected hardness, its thickness, the required precision, and the need for non-destructive testing. In a high-volume production environment3, speed and efficiency are paramount, pushing QC labs towards methods like Rockwell. In a research or failure analysis context, precision and the ability to test specific microstructures are key, making Vickers the superior choice. Brinell often finds its niche in evaluating raw materials like large forgings or castings where a larger indentation provides a more representative average of a non-uniform material. Understanding these distinct roles is essential for anyone involved in the specification, procurement, or processing of stainless steel, as it ensures the data being used is relevant and reliable for the intended application.
What challenges do engineers face when choosing between HRB, HB, and HV scales?
As an engineer, have you ever felt stuck trying to align a project's needs with the right hardness scale? This indecision can lead to over-specifying, increasing costs, or under-specifying, risking material failure. The challenge lies in translating theoretical standards into practical, real-world applications under budget and time constraints.
Engineers face challenges in selecting between HRB, HB, and HV hardness testing methods due to issues with scale conversion inaccuracies, misalignment between test methods and material properties (e.g., thickness, grain structure), and discrepancies between legacy project specifications and modern material availability, complicating procurement and validation.
The core challenge is that these scales are not just different units of measurement; they represent fundamentally different testing philosophies. An engineer's choice has direct consequences on cost, testing time, and the relevance of the data obtained. I’ve seen this firsthand with a client, an engineering contractor, who was working on a project with legacy blueprints from the 1980s. The drawings specified a Brinell (HB) hardness for a particular stainless steel component. However, the modern, globally sourced material they were procuring was primarily certified using Rockwell (HRB). They were in a bind: should they trust a standard conversion chart, which can be notoriously unreliable, or should they invest in costly and time-consuming Brinell re-testing for every batch? This dilemma highlights the friction between established standards and the realities of a global supply chain. It’s a common problem where the engineer must become a detective, understanding the original design intent behind the legacy specification to make an informed decision with modern materials. This requires a deeper knowledge that goes beyond simply reading a number off a chart.
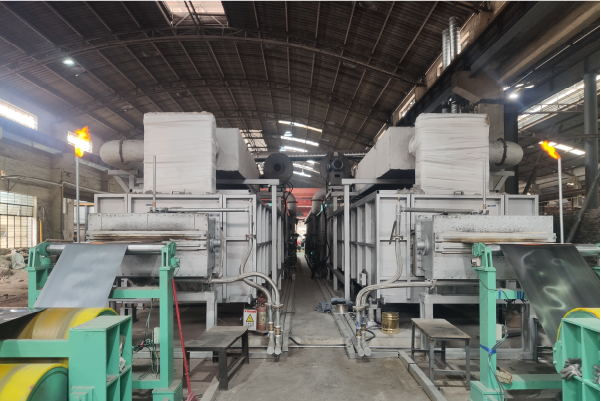
Navigating the choice between HRB, HB, and HV is a complex task for any engineer or project manager. The decision is not made in a vacuum; it's influenced by project requirements, material characteristics, and industry standards4, and supply chain realities. The primary challenge is that a direct, universally accurate conversion between these scales does not exist. While conversion charts are widely available, they are approximations based on empirical data for specific materials. Using a conversion chart for a material outside of its tested range can introduce significant errors, leading to the acceptance of non-compliant material or the rejection of perfectly good stock. This uncertainty forces engineers to weigh the risks of approximation against the costs of re-testing, a decision that can impact both project budgets and timelines. The following sections will explore these challenges in greater depth, covering the pitfalls of conversion, the mismatch between test methods and material states, and the common conflicts with project specifications.
The Unreliability of Hardness Conversion Charts
At first glance, hardness conversion charts (like those found in ASTM E1405) seem like a perfect solution to the multi-scale problem. They offer a simple way to translate a value from one scale to another. However, their reliability is limited. These charts are developed by testing blocks of a specific material and then creating a "best fit" curve. The issue is that the relationship between hardness scales is not linear and can be influenced by a material's chemical composition, work-hardening state, and microstructure. A conversion chart developed for annealed 304 stainless steel may be highly inaccurate for cold-worked 304 or for a different grade like 430 stainless steel. An engineer relying on such a chart might inadvertently approve a material that is either too hard or too soft for the application.
I recall a situation with a distributor who was supplying stainless steel fasteners to a construction project. The project spec called for a minimum Vickers (HV) value, but their supplier's mill certificate only showed Rockwell (HRB). They used a standard conversion chart and shipped the material. Unfortunately, the bolts were for a critical structural application, and the end-user performed their own incoming inspection using a Vickers tester. The material failed, as the actual HV value was lower than the converted estimate. The work-hardened state of the fastener material meant the standard HRB-to-HV conversion was invalid. This resulted in a costly rejection, project delays, and a damaged relationship between the distributor and their client. It was a harsh lesson in the dangers of treating conversion charts as gospel.
This unreliability forces a more conservative and costly approach. To mitigate risk, an engineer might be forced to specify a hardness range that is much tighter than necessary, potentially increasing material costs. Alternatively, they may have to mandate re-testing of all incoming material using the exact scale specified in the design, adding significant overhead for quality control. This is why at MFY, when a client comes to us with a conversion question, our first step is to ask about the material and its condition. We then consult our extensive internal database of test results to provide a much more reliable correlation, or we recommend the appropriate testing to eliminate any ambiguity. We believe in providing certainty, not just approximations.
Mismatches Between Test Method and Material Condition
A significant challenge arises when the chosen hardness test is fundamentally unsuited for the material's form, thickness, or condition. As we've discussed, HRB is not ideal for thin materials, and HB is too destructive for finished parts. An engineer writing a specification must have a clear understanding of the material's entire lifecycle. For instance, if they specify a Rockwell B test for a thin sheet of stainless steel that will later be stamped into a delicate electronic enclosure, they are creating a problem. The QC technician will not be able to get a reliable reading due to the anvil effect, leading to a "pass" on material that might actually be out of spec. The problem might only be discovered downstream when the part fails during forming or assembly.
Consider the case of welded components. The area around a weld, the heat-affected zone (HAZ), undergoes significant microstructural changes, resulting in a hardness gradient. You might have a soft, annealed base metal right next to a much harder, brittle zone. Trying to measure this with a large Brinell indenter would be useless; the indentation would span across all zones, giving a meaningless average. To properly assess the weld's integrity, a micro-hardness test like Vickers is required to map the hardness profile across the weld joint. An engineer who specifies only a bulk hardness test (like HRB or HB) for a welded assembly is missing the most critical data point related to its potential failure.
We often educate our clients, particularly equipment integrators, on this very point. They might receive a drawing from their customer with a single hardness value for an entire complex assembly. We work with them to break down the assembly into its components and identify the critical areas—like welds, bends, or load-bearing surfaces—that require more specific and appropriate hardness testing. This consultative process prevents future failures and ensures the final product is robust and reliable. It’s about moving from a single, generic hardness number to a strategic map of hardness requirements across the entire part.
Conflicts with Legacy and International Standards
In a globalized world, engineers frequently work on projects that span continents and decades. A power plant built in the 1990s with European components will have specifications written using standards and hardness scales (likely HV or HB) common in that region at that time. An engineer tasked with sourcing replacement parts today from a Chinese or Indian manufacturer will likely receive data in HRB. This creates a direct conflict. The engineer is bound by the original design's requirements but must procure materials from a supply chain that speaks a different "language" of standards.
This problem is compounded by the fact that the original design intent might not be fully documented. Why did the original designer choose that specific HB value? Was it related to tensile strength, wear resistance, or simply a legacy company standard? Without this context, the modern engineer is in a difficult position. A direct, but potentially inaccurate, conversion is a risk. Ignoring the original spec is also a risk. The safest route is to understand the performance requirements of the component and re-qualify a modern material against those requirements. This involves a deeper level of engineering analysis that goes beyond simple procurement.
We encountered this exact scenario with a client servicing a Russian industrial facility. The maintenance manual called for parts with a specific Brinell hardness. After our consultation, we realized the key performance requirement was abrasion resistance. Instead of trying to force their new supplier to match an archaic HB value, we worked with the client to define a functional test for abrasion. We then supplied them with a modern, cost-effective stainless steel grade, certified with HRB, that we could prove met their functional abrasion requirement. This approach—focusing on performance rather than slavishly adhering to an outdated metric—is often the most effective way to resolve conflicts between legacy standards and modern supply chains. It bridges the gap and allows for the integration of better, more economical materials while still meeting the project's core needs.
What strategies can be employed to select the appropriate hardness scale for a project?
Selecting the wrong hardness scale can feel like navigating without a compass, leading to material mismatches and project setbacks. This decision paralysis can stall procurement and introduce unnecessary risk. A clear, strategic approach is needed to ensure the chosen metric provides meaningful, relevant data for your specific application.
To select the right hardness scale, first analyze the material's properties (thickness, grade, uniformity). Then, consider the project's primary requirement (e.g., wear resistance, formability). Finally, align this with the testing context (e.g., high-volume QC vs. detailed analysis), choosing HRB for speed, HV for precision, and HB for bulk evaluation.
The key to selecting the right scale is to move beyond habit or convenience and adopt a decision-making process rooted in the engineering realities of the project. It's about asking the right questions before the specification is even written. In my experience, the most successful projects are those where the material specification is a collaborative process between the designer, the engineer, and the material supplier. I once worked with a young team of engineers designing a new line of medical devices. They were inclined to specify Vickers (HV) for all stainless steel components because of its precision. However, during our consultation, we pointed out that for many of the non-critical, thicker components, this was an expensive over-specification. The testing would be slow and costly. We helped them develop a "zoned" specification strategy: they reserved the high-precision HV scale for the critical, thin-walled components and used the much faster and more economical HRB scale for the structural housings. This pragmatic approach saved them significant time and money in quality control without compromising the safety or performance of the device.
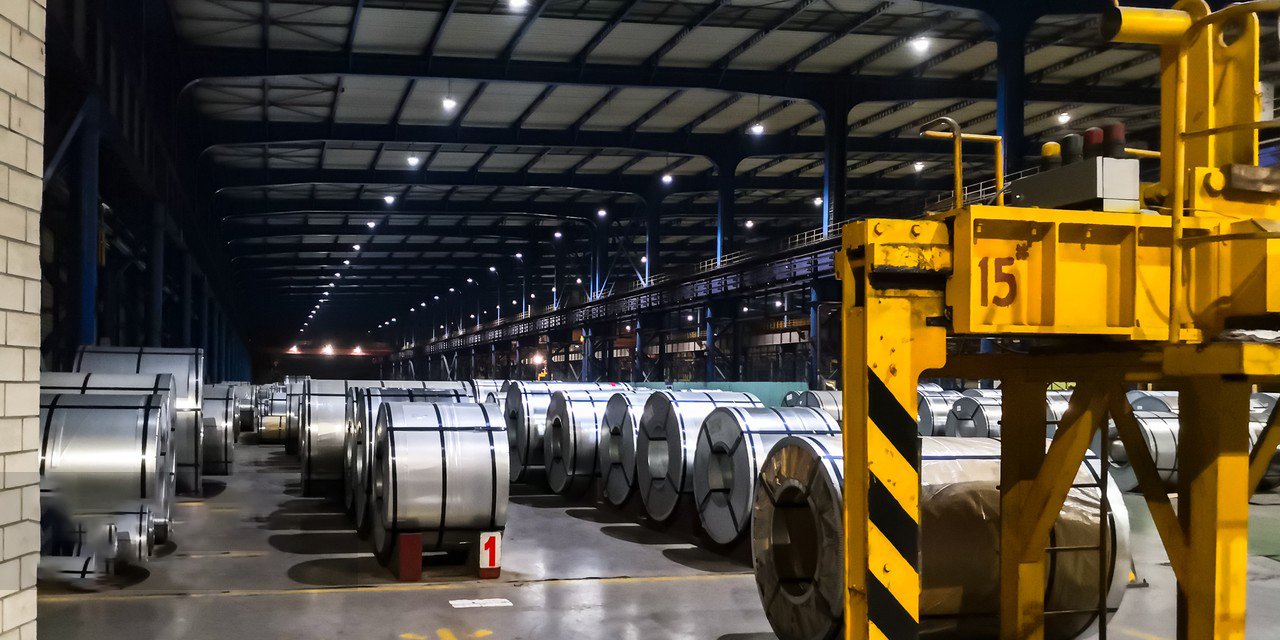
Developing a robust strategy for hardness scale selection is a proactive measure that prevents downstream complications. It’s an exercise in foresight, requiring a holistic view of the material, its intended application, and its journey through manufacturing and service. A well-defined strategy doesn't just lead to the "correct" scale; it leads to an optimized testing plan that balances cost, speed, and data relevance. It ensures that the quality control process generates information that is not just accurate, but also actionable and directly correlated to the performance criteria that matter most. At MFY, we guide our clients through a three-step strategic framework: first, an analysis of the material itself; second, a definition of the primary performance driver; and third, an evaluation of the testing context and its constraints. This structured approach removes guesswork and replaces it with a clear, defensible rationale for every testing decision.
Strategy 1: Prioritize Based on Material Characteristics
The first step in any selection strategy must be to analyze the physical characteristics of the material being tested. The most critical factors are the material's thickness, its expected hardness range, and the homogeneity of its microstructure. These properties will immediately rule certain tests in or out. For instance, if you are working with stainless steel foil that is less than 1mm thick6, both the Brinell and standard Rockwell B tests are immediately disqualified. The indentation would be too deep, influenced by the surface beneath. The only viable options would be a micro-hardness test like Vickers or a superficial Rockwell test. Conversely, if you are evaluating a large, rough sand casting, the highly localized and sensitive Vickers test would be inappropriate, as it could give misleadingly high or low readings depending on where the tiny indentation lands. The larger Brinell impression would provide a much more representative picture of the casting's bulk hardness.
Let's consider a practical example. An engineering firm is designing both the thin, decorative outer panels and the thick, structural frame for a piece of industrial equipment. For the thin panels (e.g., 0.8mm thick 304 stainless steel), the strategy would point toward Vickers (HV). The primary concern is surface quality and avoiding any distortion. For the thick structural beams (e.g., 20mm thick plate), a Rockwell B (HRB) test would be perfectly adequate and much more efficient for confirming the material meets the general strength requirements. By starting with the material's physical form, the engineer can quickly narrow down the viable options.
This initial analysis should also consider the material's state. Is it in an annealed (soft) state, or has it been cold-worked or heat-treated to a higher hardness? For standard annealed austenitic steels like 304 and 316, their typical hardness falls squarely within the reliable range of the HRB scale. However, for a martensitic grade like 440C after it has been hardened, its hardness will be far too high for the HRB scale; it would require the Rockwell C scale (HRC) or the all-encompassing Vickers scale. A sound strategy, therefore, begins with a simple checklist: What is my material? How thick is it? And what is its expected condition? Answering these questions provides a solid foundation for the next step.
Strategy 2: Align the Scale with the Critical Performance Requirement
Once the physically viable testing options have been identified, the next strategic step is to determine which property, as predicted by hardness, is most critical to the application's success. Is the primary concern wear resistance, formability, tensile strength, or something else? The choice of scale should align with this primary driver. If the component is a gear or a cutting blade where surface hardness is directly linked to its service life and wear resistance, a test that excels at measuring surface properties, like Vickers, is the superior choice. It allows for precise measurement of the "working" surface, and can even be used to check the hardness of specific coatings if they are applied.
In contrast, if the main challenge is manufacturability—specifically, the ability to stamp or deep-draw a part without it cracking—the critical factor is uniform ductility, which correlates with a consistent, relatively low hardness. In this scenario, the goal is not extreme precision but rather consistency across a large coil or batch of material. The speed and efficiency of the HRB test make it the ideal tool for this kind of process control. A manufacturer of stainless steel cookware, for example, would prioritize HRB testing to ensure their raw material has the consistent, soft properties needed for their high-volume pressing operations. Their critical performance driver is formability, and HRB is the most efficient way to monitor it.
Let's take the case of a construction contractor selecting fasteners. For a standard, non-structural application, confirming the bulk strength via a simple HRB test might be sufficient. However, for a high-vibration environment where fatigue life is the critical driver, the strategy changes. As we know, fatigue cracks often initiate at surface imperfections. A more sensitive surface test like Vickers might be strategically employed on a sample basis to ensure the surface finish and hardness are sufficient to resist fatigue crack initiation. The strategy here is nuanced: use HRB for broad batch acceptance but deploy HV for a more detailed investigation tied to the specific, critical failure mode. This alignment of the test method with the most important performance attribute ensures that the QC resources are focused where they can have the most impact.
Strategy 3: Consider the Practical Context (QC vs. R&D, Cost, and Speed)
The final piece of the strategy is to overlay the practical context of the testing environment. A decision that makes perfect sense in a research and development (R&D) lab may be completely impractical on a factory floor. The core trade-off is typically between precision/detail and speed/cost. In a high-volume manufacturing or QC environment, testing is a bottleneck. The ideal test is fast, repeatable, and requires minimal operator skill. This is the domain where the Rockwell (HRB) test reigns supreme. It delivers a "good enough" number in seconds, allowing for 100% throughput testing or frequent statistical process control checks. For a distributor receiving thousands of tons of steel coil, HRB is the only practical way to verify the supplier's data at scale.
Conversely, in an R&D, failure analysis, or product qualification setting, the priorities are reversed. Cost and speed are secondary to the quality and detail of the data. When an engineer is investigating why a part failed or is trying to qualify a new material for a critical aerospace application, they need the most precise and comprehensive data available. This is where the Vickers (HV) test is the clear strategic choice. Its ability to measure hardness on a micro-scale, test a wide variety of materials, and map hardness profiles makes it an invaluable diagnostic and research tool, despite being slow and expensive.
This strategic consideration also involves aligning with the capabilities of your supply chain. It's pointless to specify a Vickers test if your suppliers only have Rockwell testers and are unwilling or unable to perform third-party testing. A pragmatic strategy must account for the realities of the global supply chain. This might involve a two-tiered approach: specify the ideal test (e.g., HV) for the record, but also define an acceptable and well-correlated process control metric (e.g., a tighter HRB range) that can be used for routine supplier QC. This allows for practical, day-to-day quality control while retaining the ability to perform more detailed "umpire" testing if a dispute or problem arises. A smart strategy is one that works not just on paper, but in the real world of procurement and manufacturing.
How can accurate hardness measurement improve the performance of stainless steel products?
Are your stainless steel products meeting their full performance potential? Inconsistent or poorly specified hardness can lead to subpar durability and unexpected failures. By leveraging accurate hardness measurement, you can move from hoping for good performance to engineering it directly into your products from the start.
Accurate hardness measurement directly improves product performance by ensuring optimal wear resistance, fatigue life, and structural integrity. It allows for the fine-tuning of manufacturing processes like forming and machining, leading to higher quality finishes, reduced scrap rates, and enhanced long-term reliability in the final application.
The impact of precise hardness control extends far beyond the factory floor; it translates directly into tangible benefits for the end-user, including enhanced safety, longer service life, and lower total cost of ownership. I worked with a client that manufactures high-performance bicycle components. They were competing in a market where strength-to-weight ratio and durability are everything. Their initial designs, based on textbook grade properties, were underperforming. We introduced a rigorous hardness testing protocol at two key stages: on the incoming raw stainless steel tubing and after the final heat treatment process. This dual-stage verification7 allowed them to reject inconsistent raw material and precisely control the final hardening process. The result was a lighter, stronger component that could withstand higher stresses and more fatigue cycles. Their products gained a reputation for elite-level performance and reliability, all stemming from a renewed focus on the accuracy of a single, crucial metric. This demonstrates that hardness is not just a quality check; it's a performance-tuning tool.

Leveraging accurate hardness measurement is one of the most cost-effective ways to elevate the performance and reliability of any product made from stainless steel. Accuracy in this context means two things: first, selecting the appropriate scale and method for the application8, and second, ensuring the testing is performed correctly and the results are interpreted with a deep understanding of their implications. When this is achieved, hardness data transforms from a passive number on a certificate into an active tool for engineering excellence. It allows for the optimization of the classic engineering triangle: performance, cost, and reliability. By tightening the control over this one variable, a manufacturer can achieve gains in all three areas. This optimization is evident in improved product durability, streamlined manufacturing processes, and ultimately, a stronger market position built on a foundation of quality.
Enhancing Durability and Reducing Lifecycle Costs
Accurate hardness specification is the first line of defense against premature wear and failure. For any component subjected to mechanical stress—be it abrasion, impact, or cyclic loading—the correct hardness is paramount to its longevity. Consider a stainless steel pump impeller moving a corrosive and abrasive fluid. If the hardness is too low, the impeller blades will quickly erode, reducing efficiency and eventually causing failure. If the hardness is too high (perhaps due to improper heat treatment), the material could be brittle and fracture under impact from solid debris in the fluid. An accurate hardness measurement allows the manufacturer to hit the "sweet spot" that maximizes abrasion resistance while retaining the necessary toughness. This extends the impeller's service life, reduces downtime for the end-user, and lowers the total lifecycle cost of the pump.
This principle applies across countless industries. In the automotive sector, precise hardness control on stainless steel exhaust components ensures they can withstand the constant vibration and thermal cycling without fatigue failure. In the construction industry, specifying the correct hardness for stainless steel anchors and fixings guarantees their load-bearing capacity and long-term structural integrity. We once supplied material for a large public art installation that featured many intricate, welded stainless steel parts. The artist's primary concern was ensuring the piece would last for generations with minimal maintenance. By using micro-Vickers testing to verify the hardness across every single weld, we provided the assurance that these joints—the most likely points of failure—were sound and would not be susceptible to stress corrosion cracking or fatigue.
This focus on durability, driven by accurate hardness data, is a powerful value proposition. It means the product will not only perform well on day one but will continue to perform reliably for years. For a brand like MFY, helping our clients build more durable products is central to our mission. It creates a virtuous cycle: our clients gain a reputation for quality, which grows their business and, in turn, our partnership with them. It all starts with treating hardness not as a simple QC check, but as a critical design parameter for long-term performance.
Optimizing and Validating Manufacturing Processes
Accurate hardness data is a vital feedback mechanism for optimizing manufacturing processes. Whether it's cold rolling, heat treating, or welding, hardness testing is the primary way to verify that the process has achieved the desired effect on the material's properties. In our cold-rolling mills, for example, we are constantly taking hardness readings. This data tells us if our rollers are applying the correct pressure to achieve the target temper and strength in the steel. Without this accurate, real-time feedback, it would be impossible to produce coils with the consistent mechanical properties our clients rely on for their automated stamping and forming lines.
This validation role is even more critical in heat treatment. The entire purpose of processes like annealing, quenching, and tempering is to manipulate the material's microstructure to achieve a target hardness. An accurate hardness test is the ultimate proof that the process was successful. A client who manufactures surgical instruments relies on a very precise heat treatment process to give their stainless steel tools the perfect balance of a sharp, hard edge and a tough, non-brittle body. They use Vickers testing with its pinpoint accuracy to validate every single batch. This rigorous testing is non-negotiable, as it directly impacts the instrument's performance and patient safety.
Furthermore, hardness testing can be a powerful diagnostic tool when manufacturing processes go wrong. If a manufacturer suddenly experiences a high rate of cracking during a bending operation, one of the first steps is to check the hardness of the material. An unexpectedly high reading could indicate an issue with the raw material supplier or an error in a prior annealing step. This allows for rapid troubleshooting, minimizing scrap and downtime. By embedding accurate hardness testing throughout the production workflow, a company can maintain tight control over its processes, ensuring consistent quality, reducing waste, and ultimately producing a superior final product.
Building Client Confidence and Competitive Advantage
In a competitive global market, verifiable quality is a key differentiator. Providing clear, accurate, and relevant hardness data builds trust and confidence with clients. When a client receives a shipment of stainless steel from MFY, it comes with a detailed Mill Test Certificate (MTC) that specifies the hardness, tested according to the appropriate standards. This isn't just a piece of paper; it's a promise. It tells the client that we have verified the material's properties and that it will perform as expected. This transparency eliminates uncertainty and allows the client to proceed with their production with confidence, without having to bear the cost and time of extensive incoming inspection themselves.
This confidence becomes a significant competitive advantage. An engineering contractor who can prove to their client that the stainless steel rebar they are using has a verified hardness, and therefore a correlated tensile strength, is more likely to win the bid for a critical infrastructure project. A manufacturer of equipment who can provide detailed hardness maps of their welded components can command a premium price for their product's proven reliability. It transforms the conversation from one about price to one about value and risk assurance.
At MFY, we have built our brand on this principle. Our investment in advanced testing equipment and technical expertise is a core part of our value proposition. We position ourselves not just as a supplier of steel, but as a partner in quality assurance. When our clients—be they distributors, contractors, or manufacturers—present our material to their end-users, they are armed with data that substantiates its quality. This empowers them to be more competitive in their own markets. Ultimately, accurate hardness measurement is not an internal QC metric; it's a powerful tool for building a reputation for excellence that resonates all the way through the supply chain to the final customer.
Conclusion
Ultimately, mastering the language of stainless steel hardness—HRB for efficiency, HB for bulk, and HV for precision—is not just a technical skill. It is a fundamental business strategy for ensuring material integrity, optimizing production, and delivering superior, reliable products in a competitive global market.
-
Learn how various hardness scales impact material selection and performance in engineering ↩
-
Get clear definitions and learn how these values appear on steel technical sheets ↩
-
Discover the advantages of Rockwell testing for fast, routine industrial hardness checks ↩
-
See how major industries set or prefer specific hardness test methods and why it matters ↩
-
Review the official conversion standards and their stated limitations to avoid engineering errors ↩
-
Avoid common testing errors for thin materials by understanding test limitations. ↩
-
See how dual-stage hardness checks improve component performance and reliability. ↩
-
Find the most appropriate hardness scales and methods for various stainless steel needs. ↩
Have Questions or Need More Information?
Get in touch with us for personalized assistance and expert advice.

