Pipe Fittings 101: Elbow, Tee, Reducer Selection

Choosing the wrong pipe fitting can lead to leaks, pressure drops, and catastrophic system failures, causing costly downtime and safety hazards. Imagine your entire production line halting because a seemingly minor component fails. This guide provides the essential knowledge for selecting the right fittings.
Selecting the right pipe fitting involves matching the fitting's type (elbow, tee, reducer), material, size, and pressure rating to your piping system's needs. Key considerations include the required direction of flow, whether branching is needed, and how to manage changes in pipe diameter safely proper pipe fitting selection.
In my years as Global Business Director at MFY, I've seen firsthand how these small components underpin the success of massive industrial projects. This guide is more than a technical manual; it’s a collection of practical insights from the field. It’s designed to help you make informed decisions that enhance your system’s integrity, efficiency, and long-term reliability.
The selection of pipe fittings often seems straightforward, but it’s a critical decision that balances cost, performance, and long-term durability. A purely cost-driven approach might lead to selecting a fitting that meets immediate specifications but fails under operational stress. Conversely, over-engineering inflates project budgets. The key is a holistic assessment, considering not just the fluid and pressure, but thermal expansion, corrosion potential, and maintenance. At MFY, we champion a partnership approach, helping clients analyze these variables to find the optimal balance for their unique application, ensuring a robust and cost-effective solution design considerations for industrial piping.
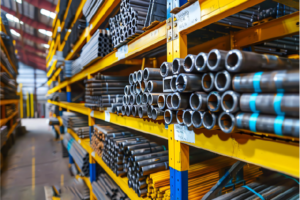
Understanding the basic types of pipe fittings: Elbow, Tee, Reducer
Navigating the world of pipe fittings without a clear grasp of the core types can be bewildering. This confusion often leads to incorrect orders, project delays, and systems that don't function as designed. Let's demystify the three most fundamental fittings: the elbow, the tee, and the reducer.
Elbows are used to change the direction of fluid flow, typically at 45° or 90°. Tees are fittings that create a branch from a main pipe, allowing for a split in the flow. Reducers are essential for connecting pipes of different diameters types of pipe fittings and their functions.
Grasping the basic function of each fitting is the first step, but true expertise lies in understanding how these simple functions translate into complex system dynamics. An elbow's radius affects pressure drop, a tee's configuration dictates flow characteristics at the branch, and a reducer's geometry can prevent damaging turbulence. These subtle differences are critical. For instance, a major construction contractor we work with in Southeast Asia was experiencing significant efficiency losses in their commercial HVAC systems. The initial audit pointed towards pump issues, but our collaborative analysis revealed the true culprit: the widespread use of short-radius elbows in tight spaces was creating excessive pressure drops, forcing the pumps to work overtime. By strategically replacing them with long-radius elbows where possible, they achieved a 15% improvement in system efficiency and a significant reduction in energy costs. This experience highlights why a nuanced understanding is not just academic—it has tangible financial and operational consequences.
A deep dive into these components reveals layers of engineering choice that impact the entire system. The decision is rarely about a single part in isolation but about how that part contributes to the whole. For MFY, our role extends beyond simply supplying stainless steel products; we engage with our clients, from engineering contractors to manufacturing firms, to ensure every component, no matter how small, is optimized for its specific context. This collaborative approach is central to our philosophy of building resilient and efficient supply chains for our global partners.
The Elbow: More Than Just a Turn
The most common function of an elbow is to change the direction of flow. These are primarily available in 90° and 45° angles, but the critical distinction lies in the bend radius: Long Radius (LR) and Short Radius (SR). A long radius elbow has a bend radius equal to 1.5 times the pipe's nominal diameter (R = 1.5D), offering a smoother turn and consequently, lower pressure drop. A short radius elbow has a radius equal to the pipe's nominal diameter (R = 1.0D), making it ideal for tight, congested spaces where layout is a priority over flow efficiency.
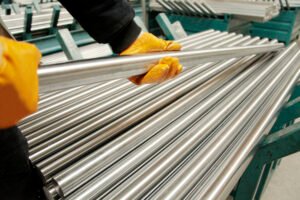
The choice of material is paramount and is dictated by the application. In industries like food processing, pharmaceuticals, or chemical manufacturing, 304 or 316L stainless steel elbows are the standard. Their inherent corrosion resistance is vital for maintaining product purity and preventing contamination, especially in systems requiring frequent clean-in-place (CIP) procedures why stainless steel is used in food and pharma piping1. For general industrial applications or water transport, carbon steel may suffice, but for projects in corrosive environments or requiring long-term durability with minimal maintenance, we almost always guide our clients towards a suitable grade of stainless steel.
I recall a project with a dairy producer in India who was expanding their facility. Their primary concern was hygiene and ensuring their products met stringent international food safety standards. The choice was clear: we supplied them with a complete system of 316L stainless steel pipes and long-radius elbows. The smooth interior finish and gradual bend of the LR elbows were critical for ensuring uninterrupted flow of milk products, preventing any potential for bacterial buildup in crevices, and guaranteeing the effectiveness of their CIP sanitation cycles. This wasn't just about fittings; it was about protecting their brand and consumer health.
The Tee: The Heart of Branching
Tee fittings are the primary method for creating a branch off a main pipe run. The two fundamental types are the Equal Tee and the Reducing Tee. An equal tee, as the name implies, has all three openings of the same diameter, used when the branch line needs to maintain the same size as the main line. A reducing tee has a smaller diameter on the branch opening, used when tapping a smaller line off a larger main pipe.
The selection of a tee directly influences the hydraulics of the system. A poorly chosen tee can lead to unbalanced flow, where one line is starved while another receives too much, impacting process efficiency. For example, when fluid flows straight through the main run of a tee, the pressure drop is minimal. However, when flow is diverted through the branch, it undergoes a significant change in direction, resulting in a much higher pressure drop. Engineers must account for these differences using flow coefficients (K-factors) during the system design phase to ensure balanced distribution how to calculate tee pressure drops and flow balance2.
This principle is evident across all industries. In a fire sprinkler system for a commercial building, equal tees are strategically placed to ensure that water pressure is distributed as evenly as possible to protect all areas of a floor. In contrast, a manufacturing client of ours in the Middle East needed to add a sampling port to a large chemical process line. We recommended a 316L stainless steel reducing tee. This allowed them to tap a small-diameter sample line off the main pipe with minimal disruption to the primary process flow, ensuring both process integrity and the ability to perform critical quality control checks.
The Reducer: Managing Flow Transitions
Reducers are essential for connecting pipes of two different diameters, but their design has significant implications for flow characteristics. The two types are Concentric and Eccentric. A concentric reducer is shaped like a symmetrical cone, maintaining a common centerline between the larger and smaller pipes. An eccentric reducer has an asymmetrical shape with one flat side, resulting in an offset centerline.
The choice is dictated by the pipe's orientation and the potential for trapped substances. For vertical pipe runs, a concentric reducer is typically used as gravity will handle any debris. However, in horizontal pipe runs, an eccentric reducer is critical. If carrying liquids, it is installed with the flat side on top to prevent air from getting trapped at the high point, which can lead to pump cavitation. If carrying gases or steam, it's installed with the flat side on the bottom to allow for the drainage of condensed water.
We recently supplied a large order of eccentric stainless steel reducers to a water treatment facility in Russia. They were specifically for the suction side of their horizontal pump installations. Our recommendation to use eccentric reducers with the flat side up was based on preventing air-induced cavitation, a phenomenon that can destroy a pump's impeller and dramatically reduce its lifespan. By preventing the formation of air pockets at the reducer, we helped the client ensure the longevity and efficiency of their critical pumping equipment. This simple choice of fitting geometry directly protected a much more valuable asset pump cavitation prevention in pipe design3.
| Характеристика | Concentric Reducer | Eccentric Reducer |
|---|---|---|
| Shape | Symmetrical, cone-shaped | Asymmetrical, one flat side |
| Centerline | Maintains the same centerline for both pipes | Offsets the centerline between the pipes |
| Primary Use | Vertical pipe runs | Horizontal pipe runs, especially on pump suction lines |
| Flow Concern | Potential for turbulence if not sized correctly | Prevents trapping of air (top flat) or sediment (bottom flat) |
Key factors to consider when selecting the right pipe fitting
Overlooking key selection factors like pressure or material compatibility can lead to a critical system mismatch. This oversight results in leaks, accelerated corrosion, and pressure failures, jeopardizing plant safety and operational continuity. Focus on the four critical factors—Pressure, Temperature, Material, and Size (PTMS)—to ensure a perfect fit.
When selecting a pipe fitting, you must consider the system's operating pressure and temperature, the chemical compatibility of the fluid with the fitting material (e.g., stainless steel for corrosive media), and the nominal pipe size and connection type for a secure, leak-proof joint.
The PTMS framework—Pressure, Temperature, Material, and Size—is the foundational checklist we instill in our new sales engineers at MFY. But theory only takes you so far. I remember a case with an equipment integrator partner in Russia who was fabricating a series of hydraulic power units. They correctly matched the pressure rating and size for their fittings but initially overlooked the extreme ambient temperature fluctuations of the operating environment, which could swing from -40°C in winter to 35°C in summer. The initial carbon steel fittings they considered became dangerously brittle at the lowest temperatures, creating a high risk of fracture under pressure. We worked closely with their engineering team to select a specific grade of stainless steel renowned for its excellent cryogenic properties and toughness. This experience was a powerful reminder that these factors are not independent variables; they interact and influence one another in critical ways. Understanding this interplay is what separates a good design from a great one.
The process of selecting the right fitting is therefore a holistic one. It's an exercise in risk management and optimization. You're not just buying a piece of metal; you're investing in the integrity of your entire system. Each factor must be weighed against the others and against the overall goals of the project, whether that's maximizing safety in a chemical plant, ensuring purity in a food processing line, or achieving long-term, maintenance-free operation in a critical infrastructure project. It is in navigating these complex trade-offs that our team at MFY provides the most value, moving beyond the role of a supplier to become a true solutions partner.
Decoding Pressure and Temperature Ratings
Every pipe fitting comes with a pressure-temperature rating4, which defines its safe operating envelope. This is not a single pressure number, but rather a curve; as the operating temperature of the fluid increases, the maximum allowable working pressure (MAWP) of the fitting decreases. This is because materials, including steel, lose some of their strength at elevated temperatures. For example, a stainless steel fitting rated for 1000 PSI at ambient temperature might only be rated for 750 PSI at 400°F (204°C). Ignoring this relationship is a common and dangerous mistake.
Engineers must consider not only the normal operating conditions but also potential upset conditions. Does the system undergo steam cleaning cycles at a much higher temperature? Are there potential pressure surges (water hammer) that could exceed the nominal rating? A distributor we work with in Southeast Asia had a client who was experiencing recurring gasket failures at flange connections. The system pressure was well within the rating of the fittings. However, our joint investigation revealed that intermittent high-temperature fluid batches were causing thermal expansion, temporarily increasing system pressure beyond the rating of the standard gaskets they were using. The solution wasn't to change the fittings, but to switch to a higher-temperature gasket material, a decision made by looking at the entire PTMS system.
Furthermore, it's crucial to consult the standards that govern these ratings, such as those from ASME5 (American Society of Mechanical Engineers). Standards like ASME B16.9 (Wrought Steel Buttwelding Fittings) and B16.11 (Forged Steel Fittings, Socket-Welding and Threaded) provide detailed pressure-temperature tables for different material groups. A deep understanding of these standards is non-negotiable for anyone designing or specifying piping systems, as they form the legal and safety basis for operation.
Material Compatibility: The Corrosion Challenge
Choosing the right material is a battle against chemistry. The fitting material must be chemically compatible with the fluid it will carry to prevent corrosion, which can lead to leaks, product contamination, and catastrophic failure. This is where stainless steel, a cornerstone of MFY's offerings, truly shines. The chromium in stainless steel forms a passive, non-reactive layer of chromium oxide on the surface, protecting it from rust and many chemical agents.
However, not all stainless steels are created equal. The most common grades are 304 and 316]. Type 304 is an excellent all-purpose choice for applications like water, food products, and sterilizing solutions. Type 316, with the addition of molybdenum, offers superior resistance to chlorides and other specific corrosive agents, making it the go-to choice for chemical processing, marine environments, and pharmaceutical applications where saline solutions are common. For a manufacturing client producing industrial cleaning agents, we had to go beyond 316L and recommend a specialized duplex stainless steel to handle the highly aggressive chemical cocktail at elevated temperatures, ensuring decades of safe operation.
The decision-making process involves a careful review of the fluid's chemical composition, concentration, temperature, and pressure. A material that is resistant at room temperature might corrode rapidly at higher temperatures. We often provide our clients with corrosion data charts that map the performance of different stainless steel grades against hundreds of chemicals. This data-driven approach removes guesswork and ensures that the material selected provides the most cost-effective solution for the required service life of the system.
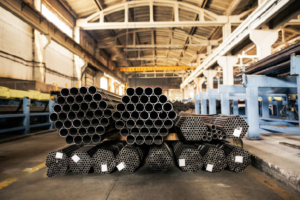
Sizing and Connection Standards
The final piece of the PTMS puzzle is ensuring the fitting is the correct size and has the right type of end connection. Sizing seems obvious—a 2-inch pipe needs a 2-inch fitting—but it's crucial to be precise about the pipe schedule and wall thickness6. The schedule number (e.g., Sch 40, Sch 80) indicates the wall thickness of the pipe. The fitting's wall thickness must match that of the pipe to ensure a smooth internal bore and to maintain the pressure-carrying capacity of the system. A mismatch can create turbulence at the joint and, more critically, a weak point in the piping.
Connection type is equally important and depends on the application's pressure, the need for disassembly, and industry conventions. Butt-weld connections, where the fitting is welded directly to the pipe, are permanent and provide the strongest, most leak-proof joint, making them standard for high-pressure and high-temperature critical services. Socket-weld and threaded connections are easier to install but create potential leak paths and are generally reserved for lower-pressure, non-critical applications.
We once worked with an engineering contractor on a natural gas processing facility. Their initial design used threaded fittings in some auxiliary lines to save on installation costs. We strongly advised them to switch to a fully butt-welded system. While the upfront cost was slightly higher due to the need for skilled welders, the long-term benefit of a zero-leak-path, maintenance-free system for a flammable gas application was an undeniable safety and operational imperative. This illustrates how connection choice is not just a technical detail but a fundamental aspect of system design and risk management.
Step-by-step guide to choosing the appropriate elbow fitting
Choosing an elbow seems simple, but selecting the wrong one creates hidden flow inefficiencies. This leads to higher energy consumption as pumps and compressors work harder to overcome unexpected pressure drops, quietly eating into your operational budget month after month. Follow our guide to select the perfect elbow every time.
To choose an elbow, first determine the required angle (90° or 45°). Then, select between a long radius (LR) for lower friction loss in main flow lines and a short radius (SR) for tight spaces. Finally, match the material and pressure rating.
This step-by-step process provides a clear path, but the decision between a Long Radius (LR) and Short Radius (SR) elbow often requires a nuanced trade-off analysis. It's not always about picking the most hydraulically efficient option. Real-world engineering is constrained by space and cost. I worked with a manufacturing client in our export market who was designing a compact, skid-mounted chemical dosing unit. The physical footprint was the primary design constraint, and they simply did not have the room to accommodate the larger sweep of LR elbows. In this scenario, the slightly higher pressure drop from SR elbows was an acceptable and necessary compromise to achieve the required compact design. The key was that this was a conscious engineering decision. They used flow modeling to quantify the expected energy penalty and deemed it acceptable within the overall system budget. Our goal is to empower you to make these same informed, deliberate choices, weighing all the variables rather than simply defaulting to a standard.
We will now break down the nuanced calculations and considerations that go into this critical decision. It’s about moving from a simple component choice to a calculated engineering judgment. This involves understanding not just the geometry, but the direct impact that geometry has on your operational expenditures and system performance. At MFY, we believe an informed customer is our best partner, and providing this deeper level of insight is fundamental to how we do business. Whether it’s providing stainless steel coils for fabrication or the finished fittings themselves, the underlying principles of good design remain the same.
Step 1: Defining the Angle and Radius
The first decision point is the angle of direction change, which is almost always 90° or 45°. This is dictated by the physical layout of your piping system. Once the angle is set, the more critical choice arises: Long Radius (LR) versus Short Radius (SR). As previously mentioned, an LR elbow (R=1.5D) provides a gentler turn, minimizing friction and pressure loss. This makes it the preferred choice for main process lines, long pipe runs, and especially on the suction side of pumps where minimizing pressure drop is critical to prevent cavitation.
A Short Radius elbow (R=1.0D)7, by contrast, forces the fluid to make a much sharper turn. This increases turbulence and results in a significantly higher pressure drop—as much as 50% higher than its LR counterpart. So why would anyone use one? The answer is space. In complex piping arrangements, such as inside machinery, on pre-fabricated skids, or in tightly packed utility rooms, the compact turning circle of an SR elbow is invaluable.
For a construction contractor client building a multi-story hotel, the choice was clear. For the long, straight vertical risers carrying water up the building, they used LR elbows to maximize flow efficiency and minimize the required pump power. However, inside the mechanical rooms where dozens of pipes converged in a small space, they strategically used SR elbows to make the intricate layout possible. This hybrid approach, using each type where it is best suited, is the hallmark of smart, cost-effective piping design.
Step 2: Calculating Pressure Drop Impact
Engineers don't guess about pressure drop; they calculate it. The resistance of a fitting to flow is quantified by its resistance coefficient (K-factor)8. The K-factor for an SR 90° elbow is typically around 0.9, while for an LR 90° elbow, it's closer to 0.6 (these values can vary slightly by manufacturer). The pressure drop (${\Delta P}$) can then be calculated using the formula: ${\Delta P = K \cdot (\rho V^2 / 2)}$, where ${\rho}$ is the fluid density and ${V}$ is the fluid velocity.
Let’s consider a practical example. In a water line with a flow velocity of 10 ft/s, the pressure drop from an SR elbow would be approximately 0.9 psi, while for an LR elbow, it would be about 0.6 psi. This difference of 0.3 psi may seem small, but in a system with dozens of elbows, the cumulative effect becomes significant. For a system with 50 elbows, that's an additional 15 psi of pressure loss that the pump must overcome, 24 hours a day.
This calculation is precisely what we walked through with a client operating a large-scale irrigation system. They were planning a system expansion and were tempted to use SR elbows everywhere to standardize their inventory. We helped them calculate the total system head loss for both scenarios. The analysis showed that using LR elbows would reduce their total pumping power requirement by nearly 10 kW. The initial savings on the fittings themselves were dwarfed by the long-term energy savings, making the choice for LR elbows an easy one.
Step 3: Material and Wall Thickness Considerations
The final step is to ensure the elbow's material and wall thickness are correctly specified. The material selection, as discussed earlier, hinges on corrosion resistance and fluid compatibility. For the majority of our clients in food & beverage, chemical, and pharmaceutical industries, Нержавеющая сталь 304L или 316L9 is the default choice for its cleanliness and durability. At MFY, our integrated supply chain allows us to control the quality of our stainless steel from the initial coil to the final fabricated fitting, ensuring full traceability and material integrity.
Equally important is matching the elbow's wall thickness (schedule) to the connecting pipe. A pipe system is only as strong as its weakest link. If you weld a thin-walled Schedule 10 elbow into a thick-walled Schedule 40 pipe system, you have created a significant weak point. The internal bore will also be misaligned, creating a "lip" that disrupts flow and can be a site for erosion or crevice corrosion.
We once had to troubleshoot a recurring weld failure for a client in their steam condensate return lines. The issue was traced back to an incorrect specification where lighter-wall elbows were being used with heavier-wall pipes. The stress at the mismatched joint, combined with thermal cycling, was causing the welds to fail prematurely. Correcting the elbow schedule specification to match the pipe schedule completely resolved the problem, reinforcing the lesson that even the smallest details in specification are critical to system reliability.
How to determine the right tee fitting for your piping system
Incorrectly specifying a tee fitting can unbalance your entire piping network, creating significant operational headaches. This can lead to one process line being starved of flow while another is over-pressurized, causing production inefficiencies, quality control issues, or even equipment damage. Learn to analyze your system's branching needs to make the right choice.
To determine the right tee, first identify if you need an equal tee or a reducing tee where the branch is smaller. Then, consider the flow dynamics and finally, match the material and end connections to the system.
The distinction between an equal and reducing tee is straightforward, but the real challenge lies in anticipating the tee's hydraulic impact and selecting the correct configuration10. It's a common oversight. I recall consulting for a large engineering contractor designing a chilled water loop for a new data center. They had initially laid out the system using equal tees throughout for simplicity. However, some of the branch lines leading to server racks were much shorter and had lower resistance than others. This created a "short-circuit," where the bulk of the chilled water followed the path of least resistance, leaving the racks at the end of the longer pipe runs inadequately cooled. This could have been avoided by a more detailed upfront analysis, potentially using reducing tees to better balance the flow, or by incorporating balancing valves downstream. This kind of foresight is what separates a standard design from a resilient, high-performance one.

At MFY, we encourage our partners to think of their piping not as a collection of individual parts, but as a dynamic, interconnected system. A tee isn't just a junction; it's a flow control device. Understanding its behavior—how it splits or combines flow streams—is fundamental to achieving the desired system performance. Whether it's for a high-purity water system in Southeast Asia or a complex chemical plant in the Middle East, the principles remain the same. The following sections will delve into the practical analysis required to select the correct tee fitting for any given application, ensuring your system operates as intended from day one.
Equal vs. Reducing Tee: A Functional Analysis
The most basic decision in tee selection is choosing between an equal and a reducing configuration. An equal tee has three openings of the same size and is used when you need to create a branch that is the same size as the main pipe. This is common in header applications such as fire sprinkler systems and air supply headers11, where the goal is to provide full-sized take-offs from a main supply line.
A reducing tee, on the other hand, has a branch opening that is smaller than the main run openings. This is arguably the more common type in complex process piping. It is used to tap a smaller auxiliary line from a larger main line. For example, a 6-inch main process line might use a 6" x 6" x 2" reducing tee to supply a small 2-inch line for instrumentation, sampling, or a minor process feed. Using a reducing tee is far more efficient and cost-effective than using an equal tee and then immediately using a reducer fitting.
A manufacturing client of ours in the automotive sector was designing a compressed air distribution system for a new assembly line. Their initial plan used all equal tees. We reviewed the plan with them and pointed out that most of the take-offs were for individual pneumatic tools that required much smaller diameter lines. By switching to stainless steel reducing tees, they eliminated the need for an additional reducer at each take-off, which cut down on the number of welded joints by half, significantly reducing both material cost and installation labor time.
Understanding Flow Coefficients (K-factors) in Tees
The hydraulic behavior of a tee is complex and depends on whether the flow is being split or combined. When flow enters the main run and splits between the straight-through path and the branch (divided flow), it behaves differently than when two streams enter the run and branch and combine into a single outlet (combined flow). Each path has a distinct resistance coefficient (K-factor)12 that engineers must use to calculate pressure drop accurately.
For divided flow, the K-factor for the straight-through path is quite low (around 0.4), while the K-factor for the flow turning into the branch is much higher (around 1.0). This means the branch line will inherently have a higher pressure loss. For combined flow, the K-factors are different again, and often higher, as the two streams turbulently mix within the tee body. Ignoring these nuances leads to inaccurate pressure drop calculations and unbalanced systems.
A classic example is designing a pump header. If you have two pumps feeding into a common discharge header via two tees, the way those tees are oriented matters. If the flows combine head-on, the turbulence and pressure loss are much greater than if they are combined in a way that encourages a smoother transition. We worked with an engineering firm to optimize the pump piping for a municipal water booster station. By carefully selecting and orienting the tee fittings based on their K-factors, we were able to minimize turbulence and reduce the overall system head, allowing them to select smaller, more energy-efficient pumps.
Case Study: Tee Selection in a Multi-Zone HVAC System
Let's consider a practical case: designing the supply piping for a multi-zone hot water heating system in a commercial building. The system has a large main header that feeds smaller branch lines, each going to a different air handling unit (AHU) for a specific zone. The goal is to ensure each zone receives its required flow rate of hot water. Using only equal tees would be a poor design choice, as the zones closest to the pump would receive excessive flow, while the zones at the end of the header would be starved.
A better design would use a series of reducing tees. The main header might start at a 6-inch diameter. The first take-off, using a 6" x 6" x 3" reducing tee, would feed the first zone. After this take-off, the main header itself could be reduced to a 5-inch or 4-inch pipe, as the total flow requirement downstream has decreased. This "telescoping" design, using progressively smaller main lines and reducing tees, helps maintain more consistent pressure along the entire length of the header.
This is a design we frequently help our distributor and contractor clients with. By using our robust inventory of stainless steel reducing tees, they can implement these more efficient telescoping designs. This not only improves system performance but also reduces material costs, as large-diameter piping is used only where necessary. Paired with balancing valves on each branch for fine-tuning, this approach ensures the system is both efficient and controllable, delivering comfort to all building occupants effectively.
Selecting the correct reducer: Guidelines and tips
A poorly chosen reducer can introduce significant turbulence into your pipeline. This not only hampers flow efficiency but can physically damage expensive downstream equipment like pumps, compressors, and flow meters through cavitation or erosion, leading to costly repairs and unexpected downtime. Follow these guidelines to select the optimal reducer.
For horizontal lines, especially at pump inlets, use an eccentric reducer with the flat side on top to prevent air pockets and cavitation. For vertical lines, a concentric reducer is typically suitable. Always ensure the material and pressure rating match the connected pipes.
The "flat side up" rule for eccentric reducers at pump suction is a well-known best practice, but truly understanding the почему is key to appreciating its importance. Air is less dense than liquid, so in a horizontal pipe, any entrained air will naturally rise to the top. A concentric reducer's symmetrical cone shape[^13] creates a high point before the diameter change, acting as a perfect trap for an air pocket. This trapped air can then be drawn into the pump as a large bubble, disrupting the flow and causing the violent collapse of vapor bubbles known as cavitation. An eccentric reducer with a flat top provides a smooth, pocket-less path for the fluid, allowing entrained air to pass harmlessly through the pump. At MFY, we don't just supply parts; we provide solutions rooted in these engineering principles. A client in the chemical processing industry was experiencing chronic pump failures that they couldn't diagnose. During a site visit, our technical team immediately identified concentric reducers on their horizontal pump inlets. We explained the mechanism of cavitation and supplied them with our 316L stainless steel eccentric reducers. The result was an immediate cessation of the pump failures and a more stable, reliable process.
This single application highlights the critical nature of reducer selection. It’s a small component that can have an outsized impact on the health of your most valuable rotating equipment. The choice between concentric and eccentric is not arbitrary; it is a deliberate engineering decision based on the physics of fluid flow. In the following sections, we will explore this distinction further, discuss the importance of reducer geometry, and provide practical installation tips to ensure you get it right every time, safeguarding your equipment and optimizing your process flow.
Concentric vs. Eccentric: The Critical Difference
The fundamental choice in reducers lies between concentric and eccentric geometry, a decision driven entirely by the installation context. A concentric reducer is symmetrical, maintaining the same centerline for both the larger and smaller pipes. Its cone-like shape is ideal for vertical pipe runs, where the force of gravity naturally prevents the accumulation of either air or debris. It's the simplest and often preferred choice when the installation allows for it.
An eccentric reducer is asymmetrical, featuring one flat side. This design means the centerlines of the larger and smaller pipes are offset. Its application is almost exclusively in horizontal piping. When installed with the flat side up (Top Flat), it's used in liquid lines, particularly on the suction side of pumps, to prevent air from becoming trapped. When installed with the flat side down (Bottom Flat), it is used in steam or gas lines to allow for the drainage of condensate or in slurry lines to prevent the settling and buildup of solids at the transition point.
Consider a project we supplied in the Middle East for a large-scale desalination plant. For the massive vertical pipes that transported seawater up to the reverse osmosis units, we supplied large-diameter concentric stainless steel reducers. However, for all the horizontal piping leading to the suction flanges of the high-pressure pumps, the specification was exclusively for eccentric reducers, installed "top flat." This dual specification on a single project perfectly illustrates the application-specific nature of the choice. It was a clear demonstration of sound engineering principles designed to maximize the reliability of a critical infrastructure asset.
Reducer Length and Its Impact on Pressure Recovery
Beyond the concentric versus eccentric choice, the length of the reducer itself plays a role in hydraulic efficiency. A standard reducer has a relatively short transition length, which can cause flow separation and turbulence, especially when there's a large difference in diameter. This results in some irreversible pressure loss. While generally minor, in high-velocity systems or systems where every bit of pressure matters, this can be a factor.
For highly sensitive applications, a long-pattern or extended-length reducer can be specified. These have a more gradual taper, which helps keep the fluid attached to the reducer walls, minimizing turbulence and maximizing pressure recovery. The fluid slows down more gently (or speeds up more gradually), which is hydraulically more efficient. This is analogous to the difference between a short and long radius elbow. The trade-off, of course, is that a longer reducer takes up more physical space and typically has a higher cost.
While not common in general industrial use, we have supplied long-pattern reducers for specialized applications, such as the inlet to a sensitive flow meter in a custody transfer application. The goal was to create a very stable and uniform flow profile as the fluid entered the meter to ensure the highest possible measurement accuracy. The slightly higher cost of the specialized reducer was easily justified by the value of the product being measured and the need for precise accounting.
Practical Application and Installation Best Practices
Correct installation is just as important as correct selection13. When a reducer is installed, it must be perfectly aligned with the pipe to ensure a smooth internal surface. For butt-weld reducers, this requires a skilled welder who can achieve full penetration without creating a weld bead that protrudes excessively into the pipe, which would create its own source of turbulence.
The most critical installation practice, however, remains the orientation of eccentric reducers in horizontal lines. As a rule of thumb to never forget:
- Pump Suction (Liquids): Install FLAT SIDE UP. This prevents air from being trapped and causing pump cavitation.
- Pipe Racks (Liquids): Install FLAT SIDE DOWN. This keeps the bottom-of-pipe (BOP) elevation consistent, simplifying the design and support of the piping.
- Steam/Gas Lines: Install FLAT SIDE DOWN. This allows for the free drainage of any condensate that may form in the line.
We make it a point to reinforce these best practices with our clients, particularly engineering and construction contractors. We might even label the boxes of eccentric reducers with their intended orientation as a helpful reminder for the installation crew on site. It’s a small service, but it prevents costly installation errors and ensures the system performs as designed from the very beginning. This commitment to practical, on-the-ground success is a core part of MFY's value proposition.
Заключение
Choosing the right elbow, tee, or reducer is more than component selection; it's a critical engineering decision. By correctly analyzing pressure, temperature, material, and flow dynamics, you build a system that is fundamentally efficient, reliable, and safe, safeguarding your operational investment for years to come.
-
Find standards and benefits of stainless steel in sanitary process piping ↩
-
See formulas and guidelines for balancing piping system flows using tee fittings ↩
-
Discover the dangers of air pockets and pump failure risk with concentric reducers ↩
-
Understand pressure-temperature curves and avoid dangerous system mismatches in your applications. ↩
-
Access official standards and tables critical to designing compliant and safe piping systems. ↩
-
Ensure proper sizing and pressure performance by matching pipe schedules and wall thicknesses. ↩
-
See quantitative data on pressure losses for SR versus LR elbows. ↩
-
Understand the K-factor for fittings and how to calculate pressure loss. ↩
-
Compare corrosion resistance and suitability of 304L and 316L stainless steel grades. ↩
-
Understand how tee configuration influences hydraulic performance and branch flow. ↩
-
Explore common uses for equal tees in practical industrial distribution headers. ↩
-
Find out how K-factors impact pressure drop and system calculation accuracy. ↩
-
Find guidelines for welding and aligning reducers for optimal hydraulic performance ↩
У вас есть вопросы или нужна дополнительная информация?
Свяжитесь с нами, чтобы получить индивидуальную помощь и квалифицированный совет.