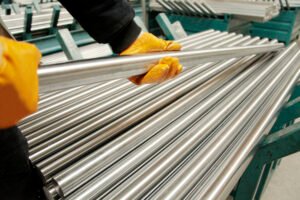
Stainless Tube Bending Radius & Springback Chart

Struggling to achieve precise, repeatable bends in your stainless steel tubes? The frustration of material waste from cracked tubes or inaccurate angles can halt production and inflate costs. The solution lies in mastering two critical concepts: the bending radius and the inevitable springback effect.
Achieving the perfect bend in stainless steel tubing requires a deep understanding of the material's properties and the bending process. The ideal bending radius is determined by the tube's diameter, wall thickness, and material grade, while springback is the material's tendency to return to its original shape.
In my years of navigating the global stainless steel market, I've seen countless projects succeed or fail based on how well they controlled their bending process. It’s a challenge that touches everyone from automotive manufacturers to architectural designers. Getting it right isn't just about avoiding scrap; it's about ensuring structural integrity, aesthetic quality, and operational efficiency. This guide will walk you through the complexities, turning a common manufacturing headache into a competitive advantage.
Precision in tube bending is not merely an operational goal; it's a foundational pillar of quality and reliability in modern manufacturing. From my experience at MFY, I’ve learned that a superficial understanding leads to costly trial-and-error. A deeper, more scientific approach is required. We must critically examine the interplay between material science, tooling design, and process parameters. For instance, while a standard chart provides a baseline, how does tool wear affect springback1 over a long production run? This article will move beyond simple definitions to explore these nuanced, real-world challenges, equipping you with the practical knowledge to master stainless steel tube bending.
How to determine the ideal bending radius for stainless tubes?
Are your tube bending operations plagued by wrinkling or, worse, fracturing? This often stems from selecting a bend radius that is too aggressive for the material. Pushing stainless steel beyond its limits leads directly to wasted material, lost time, and compromised project integrity.
The ideal bending radius for a stainless steel tube is primarily dictated by its outside diameter (OD), wall thickness (WT), and material grade. A general rule of thumb is to use a Center Line Radius (CLR) that is at least 2 to 3 times the tube's outside diameter.
Choosing the right bend radius is a critical first step that sets the stage for the entire fabrication process. An incorrect choice here creates a domino effect of problems, from failing quality control checks to potential field failures. I remember a client in the food processing equipment sector who was experiencing repeated cracking in their 304-grade tubes2. They were using a tight 1.5D bend radius that was perfectly acceptable for a different material but was too demanding for the specific wall thickness of the stainless steel they were using. By simply adjusting the radius to 2.5D and ensuring their tooling was properly lubricated, we eliminated the cracking issue entirely. This seemingly small adjustment saved them thousands in material costs and prevented significant production delays. This experience underscores that the "ideal" radius is not a single number but a calculated decision based on a holistic view of the material, the application's demands, and the capabilities of your equipment. It requires moving beyond generic guidelines and developing a feel for how the material behaves under stress, a skill that transforms a standard operator into a true craftsman.
The process of determining the ideal bend radius is a blend of science, established standards, and empirical testing. It's a foundational skill for any fabricator working with stainless steel, as it directly impacts the structural integrity and aesthetic quality of the final product. A poorly chosen radius can lead to a host of defects, including wrinkling on the inner curve (compression) or excessive thinning and cracking on the outer curve (tension). At MFY, we guide our partners to consider three core pillars when making this determination: the material's characteristics, the application's functional requirements, and the tooling available. Each of these pillars interacts with the others, and ignoring one can compromise the entire project. For example, a fabricator might have the perfect tooling, but if they are using a stainless steel grade with lower ductility, they will still face challenges with tight bends. This is why a deep dialogue between the material supplier and the fabricator is so essential. By understanding the end-use, we can often recommend a specific grade or even a custom-produced material that is optimized for the client's bending requirements, creating a more efficient and reliable manufacturing process from the very start.
The Critical Role of Wall Thickness and OD
The ratio between the tube's outside diameter (OD) and its wall thickness (WT) is perhaps the most significant factor in determining the minimum bend radius. A tube with a thick wall relative to its diameter can withstand a much tighter bend than a tube with a thin wall. This is because the thicker wall provides more material to resist the compressive forces on the inside of the bend and the tensile forces on the outside. For instance, a 2-inch OD tube with a 0.120-inch wall is far more forgiving than a 2-inch OD tube with a 0.065-inch wall.
We worked with a client in the automotive aftermarket space who was developing high-performance exhaust systems. They wanted to use a large diameter, thin-wall 304L stainless steel for weight savings, but they were struggling with the material collapsing during bending. Their initial design called for a very tight radius to navigate the complex chassis of a sports car. The problem wasn't the material itself, but the combination of the thin wall and the aggressive bend.
Our solution was twofold. First, we consulted on a minor redesign of the tooling to include a multi-ball mandrel, which provides internal support during the bend. Second, we worked with them to slightly increase the bend radius in non-critical areas, a compromise that didn't affect performance but drastically improved manufacturability. This collaborative approach, which balanced design ambition with material reality, allowed them to achieve their weight targets without sacrificing quality. This case perfectly illustrates that the OD-to-WT ratio is a hard physical constraint that must be respected and engineered around.
Material Grade and Ductility: 304 vs. 316
Not all stainless steels are created equal when it comes to formability. The specific grade of stainless steel plays a crucial role. Austenitic stainless steels like 304 and 316 are known for their excellent ductility, which makes them highly suitable for bending. However, there are subtle differences. Grade 304 is generally more forgiving and easier to bend than 316. This is due to 316's higher molybdenum content, which increases its corrosion resistance but slightly reduces its ductility and increases its rate of work hardening.
This means that for the same tube dimensions, a 316 tube might require a slightly larger bend radius or more carefully controlled bending parameters to avoid issues. A construction client fabricating architectural railings for a coastal project needed the superior corrosion resistance of grade 316. However, their existing bending processes were optimized for grade 304, and they initially experienced a higher rate of surface defects and cracking when they switched materials.
We advised them to slow down the bending speed and improve their lubrication process. The slower speed gave the material more time to flow without excessive stress concentration, and the better lubrication reduced friction with the die. It’s a common misconception that similar grades can be treated identically. Understanding the unique personality of each material grade is key. Below is a simplified table illustrating typical minimum bend radii, emphasizing that these are starting points and should be validated with physical tests.
| Tube OD (inches) | Wall Thickness (inches) | Класс материала | Typical Min. Center Line Radius (CLR) |
|---|---|---|---|
| 1.0" | 0.065" | 304 | 2.0" (2D) |
| 1.0" | 0.065" | 316 | 2.5" (2.5D) |
| 2.0" | 0.120" | 304 | 4.0" (2D) |
| 2.0" | 0.120" | 316 | 4.5" (2.25D) |
Tooling and Application Requirements
The final piece of the puzzle is the tooling itself and the functional requirements of the finished part. The quality and type of bending die, clamp block, and especially the mandrel have a direct impact on the achievable bend radius. A high-quality, close-fitting mandrel is essential for supporting the tube internally and preventing collapse, especially with thin-wall tubes and tight radii. Without a proper mandrel, even a highly ductile material will fail.
Furthermore, the end-use of the product dictates the acceptable level of deformation. In a high-pressure hydraulic system, for example, any significant wall thinning on the outside of the bend could be a critical failure point. In contrast, an architectural application might be more concerned with the aesthetic smoothness of the bend, tolerating minor thinning as long as there is no visible wrinkling.
I recall a case with an equipment integrator for the dairy industry. They needed perfectly smooth, crevice-free bends to meet sanitary standards. Even minor wrinkles on the inside of the bend were unacceptable as they could harbor bacteria. Their challenge wasn't just avoiding cracks, but achieving a flawless internal and external surface. We worked with them to select a high-polish 304L tube and specified a wiper die in their tooling setup. The wiper die applies pressure to the point where the tube leaves the bending die, effectively ironing out any tendency for wrinkles to form. This focus on the specific application's needs, translated into a precise tooling and material strategy, was the key to their success.
304 is easier to bend than 316Правда
Grade 304 stainless steel has higher ductility than 316 due to 316's molybdenum content, making it more forgiving during bending processes.
Thicker walls allow tighter bendsЛожь
Actually, thicker walls relative to diameter enable tighter bends because they provide more material to resist compressive and tensile forces during bending.
What factors influence springback in stainless tube bending?
You've calculated the perfect bend angle, but the finished tube relaxes to a wider angle every time. This phenomenon, known as springback3, is a constant source of frustration and rework. Understanding what causes it is the first step to controlling it and achieving consistent results.
Springback in stainless tube bending is influenced by material properties like modulus of elasticity and yield strength, the bend radius, wall thickness, and process parameters such as tooling and bending speed. The harder and less ductile the material, the more it will spring back after bending.
Controlling springback is arguably more of an art than determining the bend radius. It's a dynamic variable that can even change slightly from one batch of material to the next. For our clients in high-precision sectors like aerospace and medical devices, springback isn't a nuisance; it's a critical variable that must be precisely calculated and compensated for. I often share the story of a partner manufacturing surgical instruments. They were dealing with springback variations of up to 2 degrees, which was unacceptable for their application. The root cause was traced back to inconsistent material properties between coils sourced from different suppliers. By switching to a single, reliable source—in this case, MFY—that could guarantee a more consistent tensile strength and hardness across batches, they were able to stabilize their springback and reduce their rejection rate by over 80%. This highlights that the battle against springback begins long before the tube reaches the bender; it starts with a robust and reliable supply chain. It's about minimizing the variables so you can focus on perfecting the process.

To truly master springback, one must move beyond a simple definition and appreciate the complex interplay of forces at work during the bending process. When a tube is bent, the outer wall is under tension while the inner wall is under compression. Neither of these zones returns completely to its original state. The elastic portion of this deformation is what causes the material to "spring back" partially towards its original shape once the bending force is removed. The amount of springback is a direct reflection of the material's elastic limit. This is why a simple "bend it more" approach is inefficient and leads to inconsistency. A more scientific approach involves quantifying the factors that influence this elastic recovery. At MFY, we encourage our clients to think like material scientists, to look at their bending process not just as a mechanical action, but as a controlled experiment in material deformation. By methodically analyzing each factor, from material composition to lubrication viscosity, a fabricator can create a predictable model for their specific operation, turning springback from an unpredictable enemy into a manageable parameter.
Material Properties: Modulus of Elasticity and Yield Strength
At its core, springback is a function of a material's inherent properties. The two most important are the Modulus of Elasticity and Yield Strength. The Modulus of Elasticity, or Young's Modulus, is a measure of the material's stiffness. A higher modulus means the material is stiffer and will exhibit more springback. Stainless steel has a relatively high modulus compared to, for example, aluminum, so it naturally has more springback. Yield Strength is the point at which the material begins to deform permanently (plastically). A higher yield strength means more of the deformation is elastic, again leading to greater springback.
Consider the difference between annealed (softened) and work-hardened stainless steel. A client fabricating frames for backpacks wanted a strong, lightweight structure. They opted for a work-hardened stainless steel tube. However, their initial bending trials, based on data for annealed material, were wildly inaccurate. The springback was nearly double what they expected.
This happened because the work-hardening process had significantly increased the material's yield strength. More of the energy put into the bend was stored elastically. We had to guide them through a process of creating new test bends to establish a springback compensation value specifically for that hardened material. It's a critical lesson: always know the specific condition of your material, as it dramatically affects its behavior.
Geometric Factors: Bend Radius and Wall Thickness
The geometry of the bend itself is a major influencer of springback. The key relationship to understand is this: a larger bend radius (relative to the tube diameter) results in more springback. This might seem counterintuitive, but it makes sense when you consider the stress distribution. In a tight bend, a greater proportion of the material is forced past its yield point and into plastic deformation, leaving less elastic energy to cause springback. In a sweeping, large-radius bend, the stresses are lower and distributed over a larger area, meaning more of the deformation remains in the elastic range.
Wall thickness also plays a part. Thicker-walled tubes generally exhibit less springback than thin-walled tubes of the same diameter and material. The thicker wall resists deformation more strongly, leading to a greater proportion of plastic-to-elastic deformation across its cross-section.
We once consulted for a company making architectural fixtures that involved very large, gentle curves in 3-inch OD stainless tubes. Their operators were consistently under-bending the parts because the springback was much greater than they were accustomed to with their usual small-radius work. They were compensating by 3-4 degrees, when the reality for these large radii was closer to 8-10 degrees. We helped them create a simple chart correlating the bend radius with the required springback compensation, which solved the problem and improved their first-part accuracy significantly.
Process Parameters: Tooling, Speed, and Lubrication
Ly, the way you perform the bend—the process itself—can increase or decrease springback. The type and condition of your tooling are critical. A worn-out die or an improperly sized mandrel can alter the stress distribution in the bend, leading to inconsistent springback. A precision tool set ensures that the bend is clean and the forces are applied as intended, making springback more predictable.
Bending speed is another factor. A very slow, steady bend allows the material's internal stresses to distribute more evenly, which can sometimes slightly reduce springback compared to a fast, jerky motion. The most significant process parameter, however, is often lubrication. Proper lubrication between the tube and the tooling (especially the die and wiper die) reduces friction. High friction can increase the tensile force required to pull the material through the bend, which in turn can lead to more stored elastic energy and thus, more springback.
A distributor client of ours was getting feedback from their customers about inconsistent bending results from the same batch of MFY tubes. After some investigation, we discovered the issue wasn't the material, but the various lubricants being used by different end-users. Some were using light oils, others heavy greases. Those using the heavier, more effective lubricants were seeing lower and more consistent springback. This prompted us to add a recommendation to our material data sheets about best practices for lubrication, helping all their customers achieve better results.
Material properties affect springbackПравда
Modulus of Elasticity and Yield Strength directly influence how much a tube will spring back after bending.
Larger bend radius reduces springbackЛожь
Actually, larger bend radii result in more springback as more deformation remains in the elastic range.
Step-by-step guide to calculating springback in stainless steel tubes
Tired of the endless trial-and-error approach to bending? Accurately predicting and compensating for springback seems like a dark art, but a systematic approach can bring science to the process. This will save you material, setup time, and ultimately, money on every project.
Calculating springback involves bending a test piece to a known angle, measuring the final relaxed angle, and finding the difference. This springback factor can then be used to determine the necessary over-bend angle for subsequent parts, ensuring they relax to the desired final angle.
While there are complex engineering formulas4, for most practical shop-floor applications, a straightforward empirical method is far more effective. It turns an abstract concept into a tangible number you can use to adjust your CNC bender or protractor settings. I’ve walked numerous clients through this exact process, taking them from a state of guesswork to one of predictable precision. The confidence that comes from knowing your first production piece will be accurate is immense. It transforms your operation, enabling faster setups, tighter tolerances, and more reliable quoting. This isn't just about bending metal; it's about building a more efficient and profitable fabrication process from the ground up. Let's break down the steps to make this a repeatable part of your workflow.
The journey to mastering springback compensation is a practical one, rooted in methodical testing and data collection. The goal is to demystify the process and replace intuition with a reliable, data-driven procedure. While advanced software can simulate springback5 with impressive accuracy, the high cost and steep learning curve make it impractical for many shops. The beauty of the step-by-step method I'll outline is its accessibility. It requires no special software, only the tools you already have on your shop floor: your tube bender, an accurate protractor or angle finder, and a few sample pieces of the exact tube you're working with. This process empowers your operators by giving them ownership over quality control. It fosters a culture of precision and problem-solving. At MFY, we believe that empowering our partners with knowledge is as important as providing them with quality steel. An informed fabricator is an efficient fabricator, and this guide is designed to provide that critical, practical knowledge that makes a real-world difference in daily operations.
Step 1: Prepare Your Control Sample
The foundation of an accurate springback calculation is a consistent and representative test piece. You cannot use a random piece of scrap. You must select a tube from the exact same batch and lot that you will be using for your production run. As we've discussed, even minor variations in material properties between batches can affect springback. The test piece should be of a sufficient length to be securely clamped in the bender and to allow for an accurate angle measurement after bending.
Ensure the tube is clean and free from any contaminants. Prepare your bender with the exact tooling—the same die, clamp, and mandrel—that you will use for the job. Apply the same lubricant that will be used in production.
I remember a situation with a client manufacturing components for construction machinery. They were frustrated by inconsistent results, but it turned out their setup team was using one type of lubricant for test bends and another for the production run to save on costs. This seemingly small change was introducing a variable that skewed all their springback calculations. The lesson is simple: your test bend must replicate the production conditions as precisely as possible. Consistency is everything.
Step 2: The Initial Test Bend and Measurement
With your control sample ready, you will perform a precise initial bend. The goal here is not to hit your final target angle, but to create a known benchmark. A 90-degree bend is a common and convenient standard for this test. Set your bender to produce a 90-degree bend до springback compensation. Execute the bend using your standard production speed and technique.
Once the bend is complete, release the tube from the bender and allow it to fully relax. Now, using a high-quality digital or vernier protractor, carefully measure the actual, final angle of the bent tube. It will not be 90 degrees; it will be a larger angle, for example, 93 degrees. This measurement must be taken with great care. Measure on a flat, stable surface and ensure the arms of the protractor are held flat against the straight sections of the tube.
Record this "relaxed angle" meticulously. For our example, the relaxed angle is 93 degrees. This simple number is the most critical piece of data you will collect in this entire process. It represents the material's actual response to the specific bending process you've created.
Step 3: Calculate and Apply the Springback Factor
Now you can calculate the two most important values: the Springback Amount and the required Over-Bend Angle.
1. Calculate the Springback Amount: This is simply the difference between your relaxed angle and your initial bend angle.
Formula: Springback Amount (in degrees) = Relaxed Angle - Initial Bend Angle
Example: 93° - 90° = 3°
This tells you that for this specific material, tube size, and tooling, you can expect 3 degrees of springback on a 90-degree bend.
2. Calculate the Over-Bend Angle: To achieve a true 90-degree final angle, you must bend the tube past 90 degrees to compensate for the springback.
Formula: Required Over-Bend Angle = Target Angle + Springback Amount
Example: 90° (Target) + 3° (Springback) = 93°
This result tells you to set your bender to 93 degrees to produce a part that will relax back to a perfect 90 degrees.
This calculated over-bend angle now becomes your new machine setting. It's important to note that springback is not always perfectly linear across different bend angles. While this calculation is highly accurate for bends near your test angle (e.g., 80-100 degrees), for drastically different angles (e.g., 30 or 180 degrees), it's best practice to perform another test bend closer to that target angle. For most production environments, creating a small table of compensation values for common angles (45°, 90°, 180°) is a robust strategy.
Springback requires over-bendingПравда
To compensate for springback, you must bend the tube past the target angle so it relaxes to the correct position.
Test bends need different toolingЛожь
Test bends must use the exact same tooling and conditions as production to get accurate springback measurements.
How to use a bending radius and springback chart effectively?
You have access to charts filled with numbers and curves, but how do you translate that data into a perfect bend on the shop floor? These charts are powerful tools, but they are useless without knowing how to interpret and apply them correctly, leading to continued frustration.
To use a bending chart effectively, first locate your material type and tube dimensions. Cross-reference the tube's outside diameter and wall thickness to find the recommended minimum bend radius. For springback, use the chart to find the suggested compensation angle based on your material and bend angle.
Think of these charts not as infallible instruction manuals, but as expertly drawn maps. A map gives you the lay of the land, shows you the recommended path, and highlights potential hazards, but you, the navigator, must still account for the real-world conditions of your specific journey. I've seen many engineers and operators either dismiss charts as too generic or follow them so rigidly they fail to account for the unique variables of their own machine or material batch. The most successful fabricators I know use charts as a starting point. They leverage the collective knowledge condensed in the chart to get 95% of the way there, and then use the empirical testing methods we've discussed to fine-tune that last 5% for their specific context. This balanced approach—respecting the data while validating it with practice—is the key to unlocking the true potential of these valuable resources.
Effectively using a bending chart is a skill that separates novice fabricators from seasoned professionals. These charts, whether they come from a textbook, a material supplier like MFY6, or are developed in-house, represent a wealth of condensed experimental data. They are designed to save you the time and expense of starting every new job from scratch. However, a blind reliance on any chart is a recipe for inconsistency. The true art lies in understanding the context in which the chart was created and knowing how to intelligently extrapolate its data to your own unique situation. A chart is a snapshot based on a specific set of assumptions—a certain material hardness, a particular tooling configuration, a defined bending speed. Your ability to recognize the differences between those baseline assumptions and your own shop-floor reality is what will determine your success. The goal is to engage in a dialogue with the data, using it to inform, not dictate, your actions. This critical approach ensures that the chart becomes a dynamic tool for precision, not a static document that leads to "close enough" results.
Reading the Chart: Finding Your Starting Point
The first step is to correctly identify the axes and data points7 on the chart. A typical bending radius chart will have the tube's Outside Diameter (OD) on one axis and the Wall Thickness (WT) on the other. The values within the chart will indicate the recommended minimum Center Line Radius (CLR), often expressed as a multiple of the OD (e.g., 2D, 2.5D). A springback chart might have the desired bend angle on one axis and the material type/thickness on the other, with the chart data showing the required over-bend in degrees.
Let's say you're using a radius chart for a 1.5-inch OD stainless tube with a 0.065-inch wall. You would locate "1.5" on the diameter axis and "0.065" on the wall thickness axis. Where those two points intersect, the chart might give you a value of "2.0D". This means the recommended minimum CLR is 2.0 times the diameter, or 3.0 inches (1.5" x 2.0).
This value is your starting point. It's the scientifically determined "safe" radius to attempt your first bend without a high risk of material failure. A client in the furniture manufacturing business used this exact method to standardize their processes. By training their team to always consult the chart before setting up a new job, they drastically reduced setup errors and material waste, as it prevented operators from attempting bends that were physically impossible for the given material dimensions.
Interpolating Data and Understanding Limitations
Charts can't list every possible combination of dimensions and angles. This is where interpolation—estimating values that fall between the printed data points—becomes necessary. For example, if a springback chart shows 2° of compensation for an 80° bend and 3° for a 100° bend, you can reasonably interpolate that a 90° bend will require approximately 2.5° of compensation. This is an educated guess, but it's far more accurate than starting from zero.
However, it is crucial to understand the chart's limitations. Most generic charts are based on standard material conditions (e.g., annealed 304 stainless steel). If you are using a different grade (like 316L), a work-hardened material, or a tube from a different manufacturing process (e.g., seamless vs. welded), the chart's values may not be accurate.
This is why we at MFY provide detailed material specification sheets with our products. We had a case where a customer was using a generic chart for our high-strength duplex stainless steel tubes, leading to inaccurate bends. By providing them with a specific springback chart developed for that particular grade, we gave them the precise data they needed to succeed. Always check the "fine print" of a chart to see what material and conditions it's based on.
Creating and Refining Your Own Charts
The ultimate goal for any high-volume fabrication shop should be to create its own set of bending charts. These "living documents" are tailored specifically to your machines, your tooling, and your typical material supply. The process is straightforward but requires discipline. Every time you set up a new job, use the step-by-step calculation method we discussed earlier. Record the results in a spreadsheet or logbook.
Over time, you will build a powerful internal database. Your table should include columns for Material Grade, OD, WT, Tooling Set #, Target Angle, Over-Bend Angle, and Angle. This data becomes your proprietary competitive advantage. It allows for incredibly fast and accurate setups. When a repeat job comes in, your operator can simply look up the exact bender settings, eliminating the need for test bends altogether.
One of our most efficient clients, a manufacturer of hydraulic systems, has a dedicated "bending data" binder for each of their CNC benders. Their setup time is less than half of the industry average because they have refined their own charts over years of meticulous data collection. They don't guess; they know. This is the pinnacle of effective chart usage: evolving from a consumer of generic data to a creator of specific, actionable intelligence.
Charts provide recommended starting pointsПравда
Bending charts give scientifically determined safe radii and compensation angles to begin with, but require fine-tuning for specific conditions.
Generic charts work for all materialsЛожь
Most charts are based on standard material conditions and may not be accurate for different grades or manufacturing processes.
Best practices for minimizing errors in stainless tube bending
Even with the best calculations, errors can still creep into the bending process. Minimizing these errors isn't about a single secret technique; it's about building a robust system of best practices. This systematic approach is what separates amateurs from professional, high-quality fabricators.
To minimize errors, focus on three key areas: ensure material consistency by using a reliable material supplier, perform regular machine and tool maintenance, and invest in thorough operator training. A stable process built on these pillars will consistently produce accurate bends.
In my role at MFY, I’ve seen firsthand that the most successful companies are those that obsess over process control. They understand that precision bending is the result of a hundred small things done correctly. It’s a culture of discipline, not a series of quick fixes. I once visited a client who had reduced their scrap rate to almost zero. Their secret wasn't a revolutionary new machine, but a simple, color-coded system for their tooling. Each die, clamp, and mandrel set was kept together, regularly inspected for wear, and logged in a maintenance book. This simple practice eliminated a major source of variability that most shops just live with. It’s this dedication to eliminating variables, no matter how small, that paves the way for error-free production. This final section will distill these best practices into an actionable framework.

Achieving a state of minimal error in tube bending is a holistic endeavor. It extends beyond the operator and the machine to encompass the entire operational ecosystem, from material procurement to final quality control. It’s about creating a closed-loop system where each step is optimized to prevent variability from entering the process. A single worn-out tool, an uncalibrated machine, or an inconsistent batch of steel can undo all the careful calculations and planning. The principles we're about to discuss are not just operational guidelines; they are strategic imperatives for any company that wants to build a reputation for quality and reliability. At MFY, our commitment to an integrated supply chain is born from this philosophy. We know that providing consistent stainless steel8 is the first and most critical step in helping our clients build their own error-free processes. By controlling the quality of the raw material, we provide the stable foundation upon which they can build their manufacturing excellence.
Pillar 1: Material Consistency and Sourcing
The single greatest source of unforeseen error in bending is inconsistent raw material. If the hardness, tensile strength, or even the wall thickness of a tube varies along its length or between batches, your springback calculations will be useless. A change in yield strength of just a few percent can alter the springback by a whole degree. This is why the first and most important best practice is to establish a partnership with a reliable and reputable material supplier.
A good supplier does more than just deliver tubes; they provide consistency and traceability. At MFY, our integrated production process, from raw material trading to cold-rolling and tube manufacturing, gives us tight control over the final product's mechanical properties. When a client orders a batch of 304 tubes from us, they can be confident it will behave just like the last batch.
We worked with a large-scale manufacturer of commercial kitchen equipment who was struggling with high rejection rates. We analyzed their process and found that they were sourcing tubes from multiple, low-cost traders, with no real batch control. We helped them consolidate their purchasing with us, ensuring every delivery came with a detailed Mill Test Certificate (MTC). This document provides the exact chemical composition and mechanical properties of that specific batch. By inputting this data into their process control, they stabilized their bending operations and their rejection rates plummeted. Your material is not a commodity; it is the most important variable in your entire process.
Pillar 2: Machine Calibration and Tooling Maintenance
Your bending machine and its tooling are the instruments that perform the work. If they are not in optimal condition, they cannot produce precise results. Regular machine maintenance9 is non-negotiable. This includes calibrating the machine's angle readers, checking the hydraulic systems for consistent pressure, and ensuring all moving parts are properly lubricated and free from play. An uncalibrated bender that thinks it's bending to 93 degrees might actually be bending to 92.5 or 94, introducing an immediate and difficult-to-trace error.
Tooling maintenance is equally critical. Dies, mandrels, and wiper dies are consumable items that wear over time. A worn die can cause surface marring, while a worn mandrel can lead to tube collapse or inconsistent internal support. Tools should be regularly inspected for wear, cleaned, and stored properly to prevent damage.
A best practice I champion is to "marry" tooling sets. Keep the die, clamp block, mandrel, and wiper die for a specific tube size and radius together as a single kit. This ensures that the components, which wear together, are always used together, leading to more consistent performance. An automotive client implemented this system and found that it not only reduced errors but also significantly sped up their changeover times between jobs.
Pillar 3: Operator Training and Knowledge Empowerment
The most sophisticated machine is only as good as the person operating it. Investing in comprehensive and continuous training for your operators is one of the highest-return investments you can make. Training should go beyond the basic "how to run the machine." It should cover the fundamentals of what we've discussed in this article: understanding different stainless steel grades, the principles of bend radius selection, the causes of springback, and the empirical method for calculating compensation.
Empower your operators to be the first line of quality control. Give them the tools and the authority to stop production if they see something wrong. Encourage them to maintain logs and contribute to the creation of your in-house bending charts. When operators understand the "why" behind the process, they transition from being machine attendants to skilled technicians who take pride in their work and actively solve problems.
I visited a client's facility where they had a "Bending Champion" of the month program. The award went to the operator who contributed the most valuable process improvement or logged the most accurate data. This simple program fostered a culture of excellence and continuous improvement that directly translated into higher quality, fewer errors, and a more engaged workforce. Never underestimate the power of an empowered and knowledgeable team.
Material consistency prevents bending errorsПравда
Consistent material properties ensure accurate springback calculations and predictable bending behavior.
Quick fixes ensure precision bendingЛожь
Precision bending requires systematic process control and disciplined practices, not temporary solutions.
Заключение
Mastering stainless tube bending hinges on a systematic approach. By understanding the ideal bend radius, precisely calculating springback, and implementing best practices in material sourcing, machine maintenance, and operator training, you can eliminate guesswork, reduce waste, and achieve consistently accurate results in your fabrication process.
-
Learn about how gradual tool degradation affects springback in tube bending over time. ↩
-
Discover why 304-grade stainless steel tubes require specific bending parameters and their common applications. ↩
-
Learn about the causes and impact of springback in tube bending processes. ↩
-
Discover engineering formulas used for calculating springback in tube bending. ↩
-
Explore advanced software options for springback simulation in tube bending. ↩
-
Learn about MFY's specification sheets to ensure accurate bending processes. ↩
-
Understand the data points and axes in bending radius charts for precise setup. ↩
-
Understand how consistent supply affects error rates in manufacturing ↩
-
Discover the link between maintenance and precision in manufacturing ↩
У вас есть вопросы или нужна дополнительная информация?
Свяжитесь с нами, чтобы получить индивидуальную помощь и квалифицированный совет.