No.4 Brushed Stainless Sheet: A Designer’s Guide
Struggling to find a material that is both timelessly elegant and robust enough for high-traffic areas? You envision the sleek, linear grain of brushed stainless steel, but fear the complexities of specification and installation will compromise your design. Don't let uncertainty tarnish your project's brilliance.
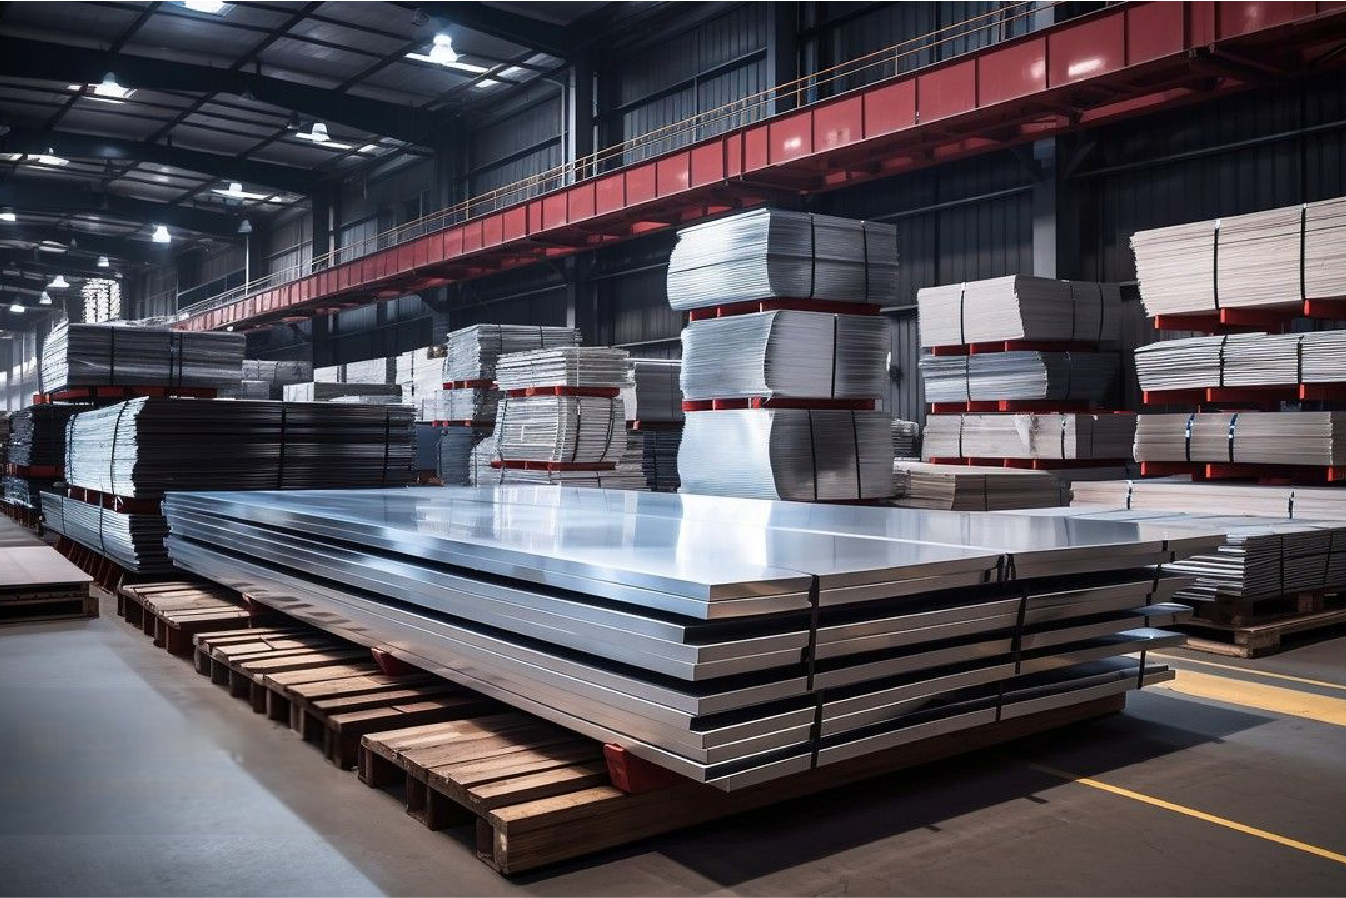
A No. 4 brushed stainless sheet is a versatile architectural material characterized by a directional, polished finish created by sanding with a 150-180 grit abrasive. It is favored by designers for its aesthetic appeal, durability, corrosion resistance, and ease of maintenance in various applications.
As the Global Business Director for MFY, I’ve seen countless designers and contractors navigate the path to using this material. The difference between a stunning, enduring installation and a disappointing failure often comes down to a few key insights. This guide is built from years of experience, answering the very questions our most successful clients ask.
I want to take you beyond the surface-level data sheets and into the practical realities of working with No. 4 brushed stainless steel. We'll delve into selecting the right grade for your environment1, mastering installation techniques that ensure a flawless finish, and implementing design strategies that truly elevate the material's inherent beauty, ensuring your vision stands the test of time.
How can designers select the right brushed stainless sheet for their projects?
Choosing the perfect brushed stainless sheet feels overwhelming with so many grades and finishes available. Making the wrong call can lead to costly rework or a final look that misses the mark, jeopardizing both budget and client satisfaction. I'll help you navigate the key criteria for a confident selection.
To select the right brushed stainless sheet, designers must evaluate the project’s environment to choose the correct grade (e.g., 304 vs. 316), specify the desired grain consistency and reflectivity, and partner with a supplier who can provide material traceability and consistent quality.
From my experience at MFY, the selection process is the most critical stage. I recall a project with a design firm, let's call them ‘ArcForm,’ who were developing a luxury seaside hotel in Southeast Asia. Initially, they specified Grade 304 for the exterior balcony railings and decorative panels due to budget constraints. They loved the No. 4 finish, but their focus was purely on the initial aesthetic. I felt a responsibility to step in and share some insights. I explained that while 304 is an excellent all-around performer, the high-salinity, humid coastal environment would inevitably lead to surface corrosion and tea-staining, tarnishing the hotel's premium image within a few years. This could lead to significant long-term maintenance costs and potential reputational damage. We discussed how a modest upfront investment in Grade 316, with its superior corrosion resistance due to added molybdenum, was not just a material upgrade but a long-term investment in the brand's integrity and the project's lifespan. This conversation shifted their perspective from short-term cost to long-term value, a crucial lesson in material specification.
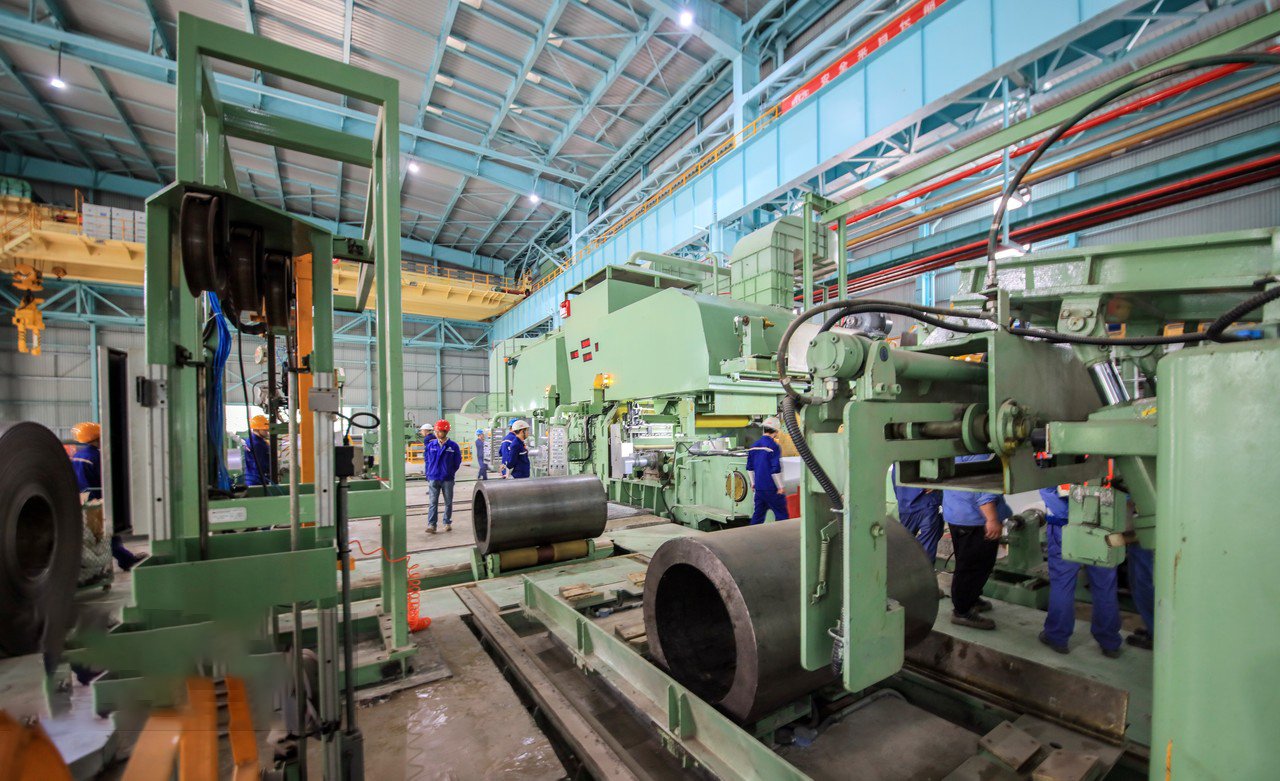
The choice is far more than a simple line item on a spec sheet; it's a foundational decision that impacts aesthetics, longevity, and budget. It requires a holistic understanding of the material's properties, the demands of the application, and the capabilities of your supply chain partner. A misstep here can cascade into problems later, from fabrication challenges to premature failure in the field. To truly master this, we need to dive deeper into the nuances of grade, the subtleties of the finish itself, and the strategic importance of your supplier relationship. This is where professional expertise transforms a good design into a truly great and enduring one. Let's break down these critical components to build a robust framework for your selection process.
Understanding Grade and Finish Nuances
The first step in selection is demystifying the grades. The most common choices for architectural applications are Grade 304 and Grade 316. Grade 304 is the workhorse of the industry, offering a fantastic balance of corrosion resistance, formability, and cost-effectiveness. It's ideal for most interior applications, such as kitchen backsplashes, decorative wall panels, and elevator cabs. In my work with interior designers, 90% of the time, Grade 304 with a No. 4 finish is the perfect solution for creating a modern, clean aesthetic without over-engineering the specification. It provides the visual appeal they need with the durability to handle typical indoor environments.
However, the game changes when the environment becomes more aggressive. This is where Grade 316 becomes essential. As I mentioned with the ArcForm hotel project, any exposure to salt spray, de-icing salts, or industrial pollutants necessitates the superior protection of 316. This grade contains molybdenum, an element that significantly boosts its resistance to chlorides. The Pitting Resistance Equivalent Number (PREN) is a great metric to illustrate this: Grade 304 typically has a PREN of around 18-20, while Grade 316 is significantly higher at 23-28. For a project in a demanding environment like a coastal city or an industrial zone, specifying 316 isn't just a recommendation; it's a requirement for ensuring longevity and minimizing maintenance.
Beyond the grade, the No. 4 "brushed" finish itself has variations. The term describes the directionally textured finish, but the depth and consistency of the grain can differ between manufacturers and even between batches. This is determined by the grit of the abrasive used (typically 150-180 grit) and the polishing process. When a project involves multiple panels that will be installed side-by-side, it's crucial to specify that all material should come from the same batch or be processed in a single run. I always advise clients like ArcForm to request a control sample, a small piece of the exact sheet they will receive, to sign off on before we run the full order. This ensures the final installation has a uniform, seamless appearance, which is critical for large-scale applications like wall cladding or column covers.
Aligning Application with Material Specifications
Once you've settled on a grade and have a clear understanding of the finish, the next step is to match the material's physical specifications to the intended application. This involves considering the sheet's thickness, its required formability, and the type of protective coating it will have upon delivery. The thickness, or gauge, of the sheet is dictated by the structural and durability requirements of the application. For purely decorative wall panels with a full backing, a thinner sheet like 22 or 24 gauge (around 0.7mm to 0.6mm) might suffice. However, for applications like countertop surfaces, elevator doors, or high-impact wall protection, a thicker gauge, such as 16 or 18 gauge (1.5mm to 1.2mm), is necessary to resist denting and deformation.
The required formability is another critical consideration, especially for designs that involve curves, bends, or complex shapes. While stainless steel is known for its strength, different grades and tempers have different forming characteristics. For instance, a designer might envision a reception desk with a smoothly curved front panel made from a No. 4 brushed sheet. In this scenario, we must ensure the specified stainless steel can be bent to the required radius without crazing (micro-cracking) the surface or distorting the brushed finish. At MFY, we often collaborate with our clients' fabricators during the design phase. We can provide data on minimum bend radii for various thicknesses and grades, ensuring the design is achievable before a single sheet is ordered. This proactive approach prevents costly fabrication errors and material waste.
ly, the protective film applied to the sheet is a small detail that has a huge impact. This temporary PVC or PE film protects the delicate brushed finish from scratches and contaminants during fabrication, transport, and installation. There are different types of films with varying levels of adhesion and durability. For projects involving extensive fabrication, like laser cutting or bending, a more robust fiber-optic laser cutting film is essential. It can withstand the intense heat of the laser without melting and leaving a residue, which is notoriously difficult to clean. For ArcForm's hotel project, which involved both on-site cutting and installation, we recommended a heavy-duty, UV-resistant film to protect the panels from both fabrication damage and sunlight exposure during the construction phase.
The Supplier's Role in a Successful Selection
The final, and perhaps most crucial, piece of the selection puzzle is your relationship with the material supplier. An experienced and transparent supplier is not just a vendor; they are a project partner. Their role extends far beyond simply taking an order. A quality supplier provides comprehensive support, from initial material consultation to ensuring consistency and providing full traceability for the products they deliver. This partnership is built on trust and a shared commitment to the project's success.
A key function of a reliable supplier is ensuring material consistency across the entire project. For large-scale architectural designs, it's common to require multiple shipments of stainless steel sheets over several months. A top-tier supplier like MFY leverages an integrated supply chain and meticulous production planning to guarantee that the No. 4 finish on a sheet delivered in June is identical to one delivered in September. This involves strict control over the polishing process and careful batch management. Without this level of control, you risk a "checkerboard" effect on the final installation, where adjacent panels have noticeably different reflectiveness or grain patterns, completely undermining the intended monolithic aesthetic.
Furthermore, material traceability is a non-negotiable aspect2 of professional material specification. Every sheet of stainless steel should come with a Mill Test Certificate (MTC). This document is the material's birth certificate, detailing its exact chemical composition, mechanical properties, and compliance with international standards like ASTM. I always insist that our clients, from large construction contractors to bespoke design firms, receive and understand the MTC for their materials. For the ArcForm project, the MTC for their Grade 316 sheets provided absolute proof that they had received the material they paid for, with the necessary molybdenum content for a coastal environment. This documentation is critical for quality assurance, client handover, and long-term accountability.
| Feature | Grade 304 Stainless Steel | Grade 316 Stainless Steel |
|---|---|---|
| Primary Alloying Elements | 18% Chromium, 8% Nickel | 16-18% Chromium, 10-14% Nickel, 2-3% Molybdenum |
| Corrosion Resistance | Good for general atmospheric conditions | Excellent, especially against chlorides and acids |
| PREN Value | ~18-20 | ~23-28 |
| Common Applications | Interior architectural trim, kitchen appliances, food processing equipment | Marine hardware, coastal architecture, chemical processing equipment, medical implants |
| Cost | Lower | Higher (typically 20-30% more than 304) |
316 grade resists salt corrosionTrue
Grade 316 contains molybdenum which provides superior protection against chloride-induced corrosion in coastal environments.
304 is always sufficientFalse
While 304 works for many applications, aggressive environments like coastal areas require the enhanced protection of 316 grade.
What are the key installation tips for using No.4 brushed stainless sheets?
You've selected the perfect No. 4 sheet, but the project is only halfway there. Improper installation can ruin the material, causing scratches, dents, or misaligned seams that destroy the sophisticated look you worked so hard to specify. It's a high-stakes moment where precision is everything.
Key installation tips include careful handling to protect the grain direction, meticulous surface preparation of both the sheet and substrate, using the correct adhesive or mechanical fasteners, and precise seam alignment and edge finishing for a seamless, professional result.
I often tell my clients that the material is only as good as its installation. A contractor we supplied in India was working on a high-end corporate headquarters, cladding a large atrium wall. They were meticulous but new to large-format stainless panels. We spent time on a video call, walking their team through the best practices for handling and sequencing. We emphasized that every panel had a "grain direction" indicated on the protective film. For a uniform, monolithic look, every single panel's grain had to be oriented in the same direction. This simple tip, along with advice on using a specific neutral-cure silicone adhesive3 that wouldn't react with the steel, was the key to their success. The final installation was flawless, a testament not just to our material but to their careful craftsmanship, guided by a few critical insights.
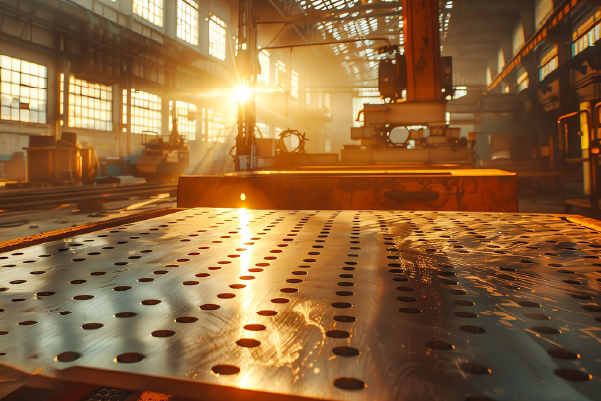
The transition from a raw sheet of steel to a finished architectural element is where design intent meets practical execution. A successful installation honors the material's properties and the designer's vision. It requires more than just basic construction skills; it demands a specific methodology tailored to stainless steel. The process begins long before the first panel is lifted into place, starting with careful planning and preparation. It continues through the choice of fastening methods, which can dramatically alter the final appearance, and culminates in the fine art of treating seams and edges to create an illusion of a single, continuous surface. Mastering these three phases—preparation, fastening, and finishing—is essential for any team aiming to deliver a truly professional and lasting result. Let’s explore each of these stages in detail.
Pre-Installation Handling and Preparation
The foundation of a flawless installation is laid during the pre-installation phase. This begins with meticulous inspection and handling of the material upon its arrival at the job site. The protective PVC film is the sheet's first line of defense, but it's not invincible. Teams should carefully inspect each sheet for any dents or deep scratches that may have occurred during transit. It's far easier to set aside a compromised panel at this stage than to replace it after it has been installed. When handling the sheets, installers should always wear clean, lint-free gloves. This prevents fingerprints and oils from the skin from etching the surface, which can become visible after the protective film is removed, especially under certain lighting conditions.
A crucial aspect of preparation is planning the layout with the brushed grain direction in mind. The No. 4 finish has a distinct, linear grain. For a large surface like a feature wall or a series of appliance panels, maintaining a consistent grain direction across all sheets is paramount for a professional, uniform aesthetic. On the back of the protective film, we always print arrows indicating the polishing direction. I always advise installation teams to treat these arrows as sacred. Before any cutting or fitting, they should lay out the panels and ensure all arrows point in the same direction, whether horizontally or vertically, as specified in the design drawings. A single panel installed with the grain running perpendicular to the others will stick out and disrupt the visual flow of the entire surface.
Surface preparation of both the stainless steel sheet and the substrate it will be mounted on is equally critical. The substrate—be it drywall, MDF, or a metal frame—must be clean, dry, and perfectly flat. Any imperfections in the substrate can telegraph through to the thin metal sheet, creating visible high or low spots. For the stainless steel itself, if adhesives are being used, the back of the sheet must be cleaned thoroughly just before application. While the protective film keeps the front clean, the back can accumulate dust or oils. A quick wipe with a solvent like isopropyl alcohol (ensuring it's approved for use with the chosen adhesive) creates a pristine surface for bonding, maximizing adhesion and preventing future delamination.
Fastening and Adhesion Techniques
The method used to attach the stainless steel sheet to the substrate fundamentally impacts the final look and performance. There are two primary approaches: adhesive bonding and mechanical fastening. Adhesive bonding is often preferred for high-end architectural applications because it provides a completely smooth, fastener-free surface. This enhances the clean, monolithic appearance designers often seek. However, not all adhesives are created equal. The choice is critical. For stainless steel, it is imperative to use a high-strength, neutral-cure silicone or a hybrid polymer-based construction adhesive. Acid-cure silicones must be avoided at all costs, as the acetic acid they release during curing can corrode the stainless steel from the back, causing surface stains to appear over time.
When using adhesives, the application technique is just as important as the product choice. A common mistake is to apply a thick, single bead around the perimeter of the panel. A better method is to apply the adhesive in a series of vertical, parallel beads, or in a serpentine "S" pattern across the entire back of the sheet. This allows for slight air movement during curing and distributes the load more evenly, preventing an uneven, "pillowed" look. It’s also vital to provide temporary support or bracing to the panel while the adhesive cures, which can take up to 24 hours. I once consulted on a project where panels on a curved wall began to slip because they were not adequately braced, a costly and entirely preventable error.
Mechanical fastening, using screws, rivets, or concealed clips, is another viable option, particularly for thicker panels or in applications where future removal might be necessary. When using exposed fasteners like decorative screws or bolts, they become part of the design aesthetic. In this case, precision is key. All fastener locations must be perfectly measured and aligned to create a deliberate, rhythmic pattern. To prevent galvanic corrosion—an electrochemical reaction that can occur when two dissimilar metals are in contact in the presence of an electrolyte—it is best practice to use stainless steel fasteners of the same or a compatible grade. If using other metals is unavoidable, nylon or neoprene washers can be used to isolate the fastener from the stainless sheet.
Seam and Edge Treatment for a Flawless Finish
The final and most artistic step of the installation process is the treatment of seams and edges. How well this is executed separates an average job from a truly masterful one. The goal is to make the transition between individual panels as invisible as possible, or to turn it into a deliberate, clean design feature. For butt joints, where two panels meet edge-to-edge, the quality of the cut is paramount. Sheets should be cut using a guillotine shear or a laser cutter equipped for stainless steel to ensure a perfectly straight, burr-free edge. Even a tiny burr or a slightly angled cut will create a noticeable gap or shadow line.
When a truly seamless look is desired, a common technique is to leave a very slight, intentional gap between panels—typically 1mm to 2mm. This is often called a "reveal." A reveal is more visually forgiving than a tight butt joint that isn't perfectly aligned. It creates a crisp, deliberate shadow line that can be incorporated into the overall design grid. The key is consistency. The gap must be perfectly uniform along the entire length of the seam. Installers use spacers during installation to guarantee this uniformity before the adhesive sets or the mechanical fasteners are fully tightened.
Edge finishing is the final touch. For exposed edges, such as on a countertop or the side of a wall panel, simply leaving the cut edge is not acceptable. It can be sharp and visually unfinished. The edge should be treated, either by breaking the sharpness with a file or sandpaper for a simple finish, or by creating a more deliberate edge profile. A common high-end detail is an "edge return," where the edge of the sheet is bent back on itself by 90 or 180 degrees. This creates a thicker, more substantial appearance and provides a smooth, safe edge. For the ArcForm hotel project, all exposed edges of the decorative panels in the lobby were detailed with a 10mm return, giving the thin sheets a robust and premium look that completed the design vision.
| Installation Challenge | Recommended Solution | Rationale |
|---|---|---|
| Grain Direction Mismatch | Orient all panels according to grain direction arrows4 on the protective film before installation. | Ensures a uniform, monolithic appearance, which is critical for the aesthetic of a No. 4 brushed finish. |
| Visible Fasteners | Use high-strength, neutral-cure silicone adhesive for a concealed bond. If fasteners are required, use stainless steel screws and plan them as a design element. | Prevents a cluttered look and avoids potential corrosion from improper adhesive choice. Aligned fasteners become part of the aesthetic. |
| Uneven or "Pillowed" Surface | Ensure the substrate is perfectly flat. Apply adhesive in vertical beads or a serpentine pattern for even load distribution. | Prevents telegraphing of substrate imperfections and ensures a flat, smooth final surface. |
| Imperfect Seams | Use a shear or laser for precise, burr-free cuts. Incorporate a consistent, narrow (1-2mm) reveal between panels. | A deliberate reveal is more visually appealing and forgiving than a poorly executed tight butt joint, creating crisp shadow lines. |
| Sharp, Unfinished Edges | Specify a finished edge, such as a "return" where the edge is bent back, or ensure edges are machine-dressed and smoothed. | Provides a safe, professional, and visually substantial finish to the installation. |
Grain direction mattersTrue
All No.4 brushed stainless sheets must be installed with consistent grain direction for uniform appearance.
Any adhesive worksFalse
Acid-cure silicones must be avoided as they can corrode stainless steel; only neutral-cure adhesives should be used.
How does one maintain and clean No.4 brushed stainless sheets effectively?
Your beautiful brushed stainless installation is complete, but now it faces the real world of fingerprints, splashes, and dust. Without a proper maintenance plan, the brilliant finish can quickly become dull and stained, diminishing the value of your design. The solution lies in simple, consistent care.
To maintain No. 4 brushed stainless sheets, use a soft microfiber cloth and a mild detergent or a dedicated stainless steel cleaner, always wiping in the direction of the grain. For stubborn spots, use a non-abrasive paste and rinse thoroughly.
A client who owns a chain of cafes in the Middle East once called me, frustrated that the stainless steel counters and backsplashes we supplied were constantly smudged. His staff was using a generic all-purpose cleaner and wiping in circles. I explained that the key was twofold: use the right cleaner, and always follow the grain. Wiping against the grain pushes residue into the tiny grooves of the finish. We sent them a case of a pH-neutral cleaner and a simple infographic for their staff. The problem vanished overnight.
Effective maintenance is not about aggressive, infrequent scrubbing; it's about gentle, regular cleaning and having a clear plan for dealing with specific issues. An effective maintenance strategy is proactive, not reactive. It preserves the material's integrity and appearance for years, protecting the client's investment and the designer's reputation. This strategy can be broken down into three core areas. First, establishing simple and effective routine cleaning protocols. Second, knowing how to address common issues like fingerprints and scratches5 without causing further damage. And third, understanding long-term protective measures that can reduce maintenance efforts and shield the steel from harsher conditions. By implementing a comprehensive approach covering these three pillars, you ensure the stainless steel looks as good on year ten as it did on day one.
Routine Cleaning Protocols vs. Deep Cleaning
The most important aspect of stainless steel maintenance is establishing a simple, consistent routine. For 90% of situations, routine cleaning is all that's needed. The golden rule is to be gentle. The best tool is a soft, lint-free microfiber cloth. For daily dusting or light cleaning, a dry cloth is sufficient. For cleaning light smudges or water spots, dampen the cloth with warm water and a small amount of mild dish soap. The most critical technique, which I cannot overstate, is to always wipe in the direction of the brushed grain. This lifts dirt out of the fine grooves of the finish. Wiping in a circular motion or against the grain can embed particles into these grooves and may even cause micro-scratches over time. After wiping with the cleaning solution, rinse the surface with a clean, water-dampened cloth and then dry it completely with another dry cloth to prevent water spots and streaks.
Deep cleaning is reserved for situations where routine cleaning is insufficient to remove stubborn or built-up grime, oils, or stains. This should be a less frequent, as-needed activity. Before attempting a deep clean, it's always best to start with the mildest method and only escalate if necessary. A good next step is a paste made from baking soda and water. Apply the paste with a soft cloth, gently rubbing in the direction of the grain. This mild abrasive can lift tougher stains without scratching the steel. After treating the area, it is crucial to rinse the surface thoroughly with clean water and dry it completely to remove all residue.
For very stubborn stains, specialized stainless steel cleaners6 are available. It is vital to choose a cleaner that is chloride-free. Chlorides, found in many common bleaches and abrasive cleaners, are the enemy of stainless steel and can cause pitting and corrosion. When using a commercial cleaner, always test it on a small, inconspicuous area first to ensure it doesn't discolor or damage the finish. Never use abrasive materials like steel wool, scouring pads, or gritty powders, as these will permanently scratch and ruin the No. 4 brushed finish, creating a repair headache that is far worse than the original stain.
Addressing Common Issues like Fingerprints and Scratches
Fingerprints and smudges are the most common complaint, especially in high-touch areas like elevator panels, door push plates, and kitchen appliances. These are simply oils from the skin disrupting the uniform reflection of the surface. While routine cleaning removes them, they can reappear quickly. A simple and effective spot-cleaning solution is to use glass cleaner (ammonia-free is best) or a small amount of isopropyl (rubbing) alcohol on a microfiber cloth. A quick wipe, again following the grain, will remove the oils and evaporate quickly without leaving streaks. For clients particularly concerned about this, there are stainless steel products available with an anti-fingerprint (AFP) coating, which is a transparent layer that significantly reduces the visibility of smudges.
Minor scratches, unfortunately, can happen. If a scratch is very light and superficial, it can sometimes be blended into the surrounding finish. There are specialized kits available for this, which typically include a series of abrasive pads of varying grits. This is a delicate operation that should be approached with extreme caution, as improper technique can make the area look worse. The process involves carefully rubbing the pad along the scratch, only in the direction of the existing grain, to blend the new, finer scratches with the original finish. This should always be tested in an unseen area first. I generally advise clients that for isolated, deep scratches, attempting a self-repair is risky and can create a larger, more noticeable blemish.
Preventing scratches is always the better strategy. Educating users or cleaning staff is key. This means no dragging of hard objects (like metal containers or ceramic pots) across the surface. Use cutting boards on countertops and place protective pads under equipment. In commercial environments, this can be more challenging. For the cafe chain I worked with, we recommended they install small, transparent bumper pads on the corners of their heavy coffee grinders to prevent them from scratching the stainless steel counters they sat upon. It’s these small, proactive measures that make the biggest difference in preserving the finish over the long term.
Long-Term Protective Measures and Coatings
Beyond daily cleaning and spot treatment, there are long-term measures that can protect the steel and reduce maintenance efforts. The most basic form of protection is a layer of wax or a specialized stainless steel polish that leaves behind a non-greasy protective film. These products work by creating a barrier on the surface that repels water and makes it harder for oils and dirt to adhere. This can reduce the frequency of cleaning needed and make subsequent cleanings easier. Application is simple: apply a small amount to a clean, dry cloth and wipe it onto the surface, following the grain, then buff off any excess.
In more demanding environments, or for clients who desire the ultimate in low-maintenance solutions, more advanced coatings can be considered. As mentioned, an anti-fingerprint (AFP) coating is one such option that can be applied at the factory level. This is a very thin, transparent coating that doesn't obscure the brushed finish but changes the surface energy, making it hydrophobic and oleophobic (repelling water and oil). For the ArcForm hotel, they were interested in this technology for their high-traffic elevator interiors. While it added to the initial material cost, their analysis showed it would significantly reduce daily cleaning labor costs, providing a return on investment in under two years.
For exterior applications or those in highly corrosive environments, even Grade 316 can benefit from additional protection7. Clear protective coatings, similar to automotive clear coats, can be applied to provide an extra barrier against salt, pollution, and UV radiation. These coatings must be specifically designed for stainless steel to ensure proper adhesion and clarity. This is a specialized application that adds cost and should be evaluated based on the severity of the environment and the desired longevity of the pristine finish. It represents the highest level of proactive protection, ensuring the architectural design remains as striking as intended for decades to come.
| Issue | Recommended Action | "Do Not" Action |
|---|---|---|
| Routine Dust & Dirt | Wipe with a dry or damp microfiber cloth in the direction of the grain. Use mild soap if needed. | Do not wipe in circles or use abrasive powders. |
| Fingerprints & Smudges | Spot clean with glass cleaner or isopropyl alcohol on a soft cloth, following the grain. | Do not use oily polishes that attract more dust. |
| Stubborn Stains | Gently rub a paste of baking soda and water, following the grain. Rinse and dry thoroughly. | Do not use cleaners containing chlorides or bleach. |
| Light Scratches | Use a specialized scratch removal kit with extreme care, testing in an inconspicuous area first. | Do not use steel wool or scouring pads. This will ruin the finish. |
| Water Spots | Rinse with clean water and dry immediately and thoroughly with a soft cloth. | Do not let water air-dry on the surface. |
Clean with the grainTrue
Always wipe No.4 brushed stainless steel in the direction of the grain to prevent embedding dirt and causing micro-scratches.
Use steel wool for tough stainsFalse
Steel wool and abrasive pads will permanently damage the brushed finish; use non-abrasive pastes instead.
What design techniques can enhance the aesthetic appeal of brushed stainless sheets?
You understand the technical aspects, but how do you make brushed stainless steel truly sing in your design? Simply specifying the material isn't enough. To unlock its full potential, you must treat it not just as a surface, but as a dynamic element that interacts with its surroundings.
To enhance the aesthetic appeal of brushed stainless sheets, designers can strategically use lighting techniques for stainless steel to accentuate the grain, combine it with contrasting materials in design like wood or stone, and employ advanced fabrication techniques like perforation, etching, or gentle curving.
I once collaborated with an architectural firm, ArcForm, on a corporate lobby project. They planned a large feature wall using our No. 4 sheets. My suggestion was to integrate a "wall grazing" lighting technique, placing LED strips at the very top and bottom of the wall. The light, casting down at a sharp angle, caught the microscopic edges of the brushed finish, transforming the flat wall into a surface with incredible depth, texture, and a soft, linear glow. This simple lighting trick elevated the entire space.
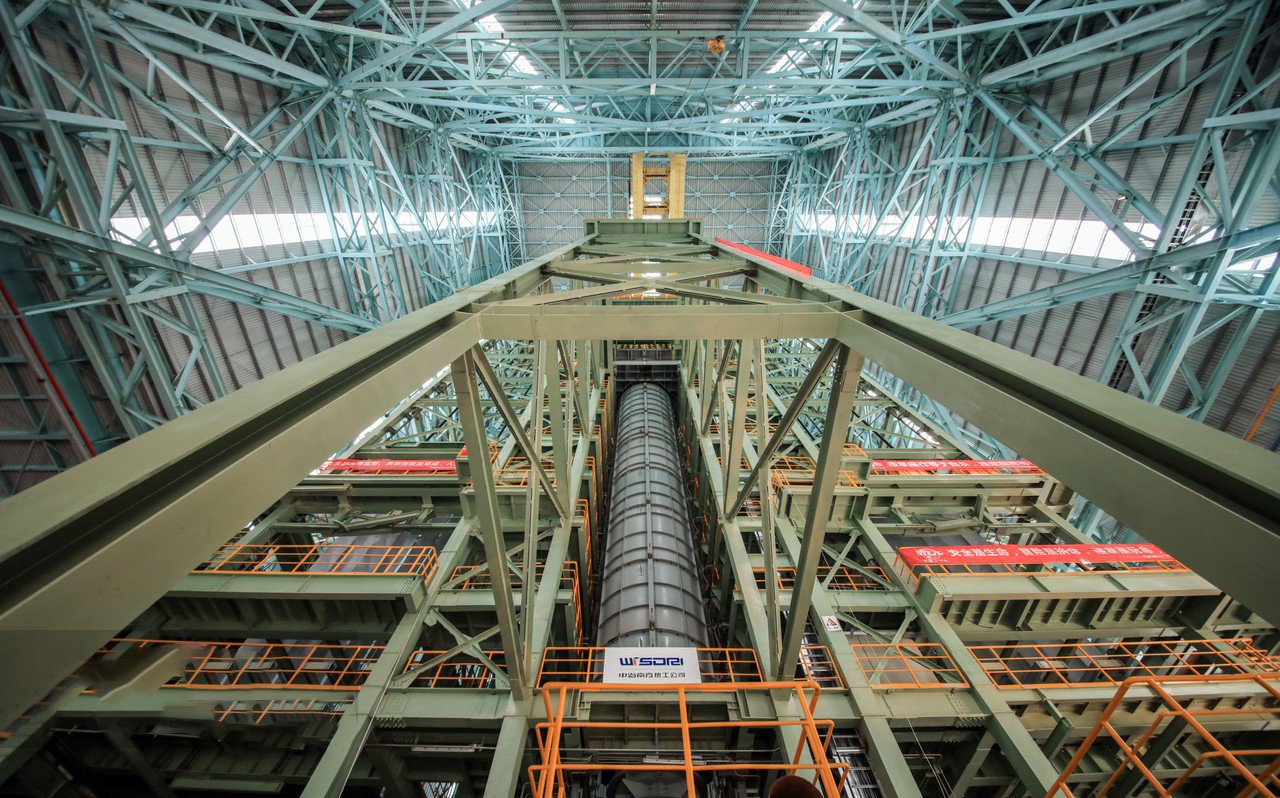
Unlocking the full aesthetic power of brushed stainless steel requires moving beyond its default state and thinking about how it interacts with light, texture, and form. A truly memorable design doesn't just use the material; it celebrates it. To achieve this, we can explore three powerful design strategies. First is the artful use of lighting, which is perhaps the most effective and dramatic tool for manipulating the appearance of the brushed finish. Second is the thoughtful combination of stainless steel with other materials, creating a rich textural and visual dialogue within a space. Finally, we can push the boundaries of the material itself through advanced fabrication techniques, transforming a simple flat sheet into a complex and artistic architectural feature. By mastering these approaches, you can create designs that are not only beautiful but also deeply compelling and unique.
Lighting's Role in Highlighting the Brushed Finish
Lighting is the most critical partner to a No. 4 brushed finish. The material's appearance is not static; it changes dramatically based on the type, angle, and intensity of the light that hits it. The directional grain of the finish is designed to catch and reflect light in a linear pattern. Direct, head-on lighting can sometimes flatten the appearance, making it look uniform but less interesting. The real magic happens when you use lighting to accentuate the texture. As I shared in the story about the lobby project, "wall grazing" is a powerful technique. By placing a light source very close to the surface and aiming it at a sharp, oblique angle, the light rakes across the brushed grooves, creating a beautiful interplay of fine highlights and shadows that emphasize the texture and linearity of the finish.
The color temperature of the light also plays a vital role in setting the mood. A cool white light (4000K-5000K) will emphasize the crisp, clean, and modern qualities of the stainless steel, making it feel sleek and technical. This is often perfect for commercial kitchens, laboratories, or futuristic retail spaces. Conversely, a warm white light (2700K-3000K) will bring out a softer, almost golden undertone in the steel, making it feel more inviting and luxurious. For the ArcForm hotel lobby, we tested both, and the client chose a warm 3000K graze, which made the imposing feature wall feel surprisingly warm and welcoming, complementing the hospitality environment perfectly.
Designers can also play with dynamic or integrated lighting. Imagine backlighting a perforated stainless steel panel, where light shines through a custom pattern, creating a dramatic moiré or starburst effect. Another advanced technique is to integrate LED lighting directly into the architectural details, such as recessing a thin light strip within a reveal between panels. This can be used to outline shapes, provide wayfinding, or simply create a stunning visual effect where the light itself seems to emanate from the joints of the structure, further highlighting the precision and clean lines of the installation.
Combining with Other Materials for Textural Contrast
While a large expanse of brushed stainless steel can be powerful, its beauty is often amplified when it is placed in dialogue with other materials. The contrast in texture, color, and finish can create a rich, layered, and sophisticated palette. Pairing the cool, precise, man-made feel of No. 4 stainless steel with the warm, organic, and rustic nature of natural wood is a classic and timeless combination. Think of a modern kitchen with sleek brushed steel appliances and countertops set against reclaimed wood cabinetry. The steel highlights the grain and warmth of the wood, while the wood prevents the steel from feeling too cold or clinical.
Similarly, combining brushed steel with natural stone like marble, slate, or granite creates a powerful statement of modern luxury. The smooth, directional lines of the brushed steel provide a clean counterpoint to the organic, often chaotic veining of the stone. I have seen this used to great effect in high-end bathrooms and reception desks, where a waterfall-edge countertop of veined marble is framed by brushed stainless steel support structures or kick plates. The steel brings a sharpness and precision that grounds the natural exuberance of the stone.
Beyond natural materials, designers can also create contrast with other finishes and colors. Placing a brushed steel panel next to a highly polished, mirror-finish stainless steel element can create a fascinating study in reflection and texture. Likewise, setting it against a matte black or a vividly colored painted surface can make the metallic quality of the steel pop. For a project with a distributor in India, they designed a commercial storefront that combined our No. 4 sheets with panels of powder-coated aluminum in a deep matte charcoal. The contrast was striking; the brushed steel captured and reflected the ambient light, while the charcoal panels absorbed it, creating a dynamic facade that had immense visual depth and curb appeal.
Advanced Fabrication: Bending, Perforating, and Etching
To truly push the design possibilities, one must explore what can be done to the sheet itself through advanced fabrication. Transforming the flat plane of the sheet into a three-dimensional object opens up a new world of creativity. Stainless steel is highly formable, allowing it to be bent and curved to create soft, flowing forms. Instead of a flat wall, imagine a gently undulating feature wall made of vertical brushed steel panels. This would catch the light in constantly shifting ways as you move past it, creating a dynamic and engaging experience. Similarly, reception desks, bars, and column covers can be designed with elegant curves that showcase the material's ability to be both strong and fluid.
Perforation is another exciting technique. Using CNC punching or laser cutting, intricate patterns can be cut into the sheets. This can serve both functional and aesthetic purposes. Functionally, perforated panels are excellent for ventilation grilles, acoustic baffling (when backed with sound-absorbing material), or as screens that provide privacy while still allowing light and air to pass through. Aesthetically, the patterns themselves can become the primary design feature. ArcForm recently designed custom perforated panels for a hotel bar, with a pattern derived from the company's logo. When backlit, these panels created a stunning and unique branding element that was both art and architecture.
For the ultimate in customization, designers can turn to etching. This process uses chemical or laser etching to permanently mark a pattern or image onto the surface of the steel. Unlike a printed graphic, an etched design has a subtle texture and permanence. This can be used to create intricate patterns, custom typography, or even photorealistic images. Imagine an elevator interior where the walls are not just plain brushed steel, but feature a subtly etched pattern of a local map or an abstract design. This level of detail transforms a standard material into a bespoke work of art, creating a unique and memorable experience for the user. These advanced techniques, while requiring specialized fabricators, allow a designer to put their unique signature on a project.
| Technique | Design Effect | Best Application |
|---|---|---|
| Wall Grazing Lighting | Emphasizes the linear grain, adds depth and texture. | Large feature walls, columns, long corridors. |
| Contrast with Wood | Creates a warm, modern aesthetic by balancing cool metal with organic texture. | Kitchens, hospitality interiors, corporate offices. |
| Contrast with Stone | Provides a luxurious, high-end feel by pairing sleek lines with natural veining. | Bathrooms, reception desks, lobbies. |
| Curving and Bending | Transforms the flat sheet into a fluid, three-dimensional form. | Column covers, reception desks, feature walls. |
| Perforation | Creates patterns, allows light/air transfer, and can be used for acoustic control. | Screens, ventilation grilles, decorative panels, ceiling tiles. |
| Etching | Adds permanent, custom graphics or intricate patterns for a bespoke finish. | Elevator interiors, signage, branded architectural elements. |
Lighting enhances brushed steel textureTrue
Wall grazing lighting at sharp angles accentuates the linear grain pattern of brushed stainless steel.
Brushed steel works with any materialFalse
Brushed steel creates the most effective contrast when paired with specific materials like wood or stone that complement its properties.
How can designers ensure the longevity of brushed stainless sheets in their designs?
You’ve designed a stunning space, but how do you ensure it stays that way for decades? Material longevity isn't guaranteed; it's engineered. Choosing the wrong grade or neglecting protective measures can lead to premature aging, corrosion, and the slow degradation of your design vision.
To ensure longevity, designers must specify the correct stainless steel grade (e.g., 316 for coastal areas), detail the design to prevent water pooling, and implement a long-term maintenance plan that is clearly communicated to the building owner.
True longevity is a result of foresight. I worked with a construction contractor on a public transit station, a very high-abuse environment. By specifying thicker gauge 316L steel, ensuring all designs had sloped tops to shed water, and providing a detailed 20-year maintenance manual to the transit authority, we ensured the design would withstand not just the elements, but decades of public use. That’s designing for legacy.
Ensuring that your brushed stainless steel installation endures is the final, critical step in a successful design process. It's about building a legacy, not just a momentary aesthetic. This long-term thinking protects the client's investment and solidifies your reputation for quality and foresight. A design that looks brilliant on day one but degrades by year five is ultimately a failure. The pursuit of longevity requires a proactive and holistic approach that begins in the earliest design phases and extends far beyond the construction handover. This approach can be structured around three fundamental pillars: first, understanding and mitigating the critical impact of environmental factors8 through correct material specification; second, utilizing the right protective films and coatings as a first line of defense; and finally, establishing a clear and practical framework for long-term inspection and care that empowers the building owner to maintain your vision.
The Critical Impact of Environmental Factors
The single most important factor determining the longevity of a stainless steel installation is its interaction with the surrounding environment. A designer must play the role of a forensic analyst, predicting the challenges the material will face over its lifespan. The primary adversary is corrosion, and the main culprit is exposure to chlorides. As we've discussed, this makes the distinction between Grade 304 and Grade 316 absolutely critical. For any exterior application within 50 kilometers of a coastline, or in areas where de-icing salts are used in winter, specifying Grade 316 is non-negotiable for ensuring long-term performance. Using 304 in these environments will inevitably lead to "tea staining," a superficial but unsightly brown discoloration that is difficult and costly to remove.
Beyond coastal salt, designers must consider industrial pollution. Urban environments can have high concentrations of sulfur dioxide and nitrogen oxides, which can form acidic compounds on surfaces and accelerate corrosion. In these cases, even for projects far from the coast, Grade 316 is often the safer and more prudent choice for exterior elements. I consulted on a project for a corporate headquarters in a heavy industrial zone. Even though it was an interior application in the main atrium, the building's HVAC system drew in outside air. We recommended 316 for the large-scale installations near the main entrances to preempt any potential issues from the polluted air over the 30-year design life of the space.
Another crucial environmental factor is moisture. Good design detailing should always aim to shed water, not collect it. Flat horizontal surfaces, crevices, and unsealed joints where water can pool are invitations for trouble. Pooled water, especially when it contains dissolved salts or pollutants, will dramatically accelerate corrosion. Therefore, designs should incorporate subtle slopes on surfaces like sills and caps to promote drainage. Lap joints should be designed to shed water downwards, and any crevices should be sealed with a durable, non-corrosive sealant. These small design details are invisible to the casual observer but are fundamental to the building's long-term health.
Choosing the Right Protective Film and Coatings
The first line of defense for a stainless steel sheet is its temporary protective film. This film's job is to shield the pristine brushed finish from the rigors of fabrication, transportation, and installation. However, this film is not meant for long-term exposure to the elements. A very common and costly mistake I see is when installation crews leave the protective film on for too long after the installation is complete. Most standard PVC films are not UV-stable. If left exposed to sunlight for weeks or months, the UV radiation can break down the film and its adhesive. The adhesive then bakes onto the steel surface, becoming incredibly difficult to remove without harsh chemicals or abrasives that can damage the finish.
As a rule, I advise all our clients that the protective film should be removed as soon as the risk of construction-related damage has passed, typically within a few days of final installation. For projects with longer construction timelines where panels are installed early, specifying a UV-resistant film is a wise investment. This provides a wider window for removal without risking adhesive residue. For the transit station project, we specified a heavy-duty, UV-stable film and put a clear "Remove by [Date]" instruction on the project documents to ensure the contractors adhered to the timeline.
For ultimate longevity in harsh environments, permanent protective coatings can be considered. These are clear, factory-applied coatings that provide a durable barrier against the elements. Nanotechnology-based coatings can create a hydrophobic and oleophobic surface that repels water and oil, making the surface "self-cleaning" to a degree and much easier to maintain. For iconic architectural projects or critical infrastructure, fluoropolymer coatings (similar to Teflon) can be applied. These offer the highest level of protection against corrosion, abrasion, and UV degradation, ensuring the aesthetic integrity of the steel for decades. While these coatings add to the initial cost, they can drastically reduce the lifecycle maintenance costs of the building.
A Framework for Long-Term Inspection and Care
A designer's responsibility does not end at the construction handover. Providing the building owner with a clear and concise maintenance framework is a crucial final step in ensuring longevity. This should be a formal document, often included as part of the project's Operations and Maintenance (O&M) manuals. This document demystifies the process for the facilities management team, who may not be experts in stainless steel. It should clearly outline the recommended frequency for routine cleaning based on the environment (e.g., monthly for an interior lobby, weekly for a coastal exterior).
The framework must provide specific, actionable instructions. It should list the recommended cleaning agents (e.g., "mild, pH-neutral detergent," "chloride-free glass cleaner") and, just as importantly, a list of prohibited items ("NO bleach, abrasive powders, or steel wool"). Providing brand name examples can be helpful. The document should also reiterate the most important technique: "Always clean in the direction of the brushed grain." Including simple diagrams or photos can be incredibly effective in communicating these core principles.
The framework should include a schedule for periodic inspections. For example, it might recommend an annual walk-around inspection specifically to check for any signs of staining, scratches, or sealant failure at the joints. Early detection of a minor issue, like a failed sealant bead that is allowing water ingress, can prevent a major, costly problem from developing down the line. By providing this comprehensive guide, you are empowering the owner to become a steward of your design. You transition the project from a static object to a living part of the building that is cared for and preserved, ensuring your design vision endures for its full intended lifespan.
316 steel resists coastal corrosionTrue
Grade 316 stainless steel contains molybdenum which provides superior corrosion resistance in chloride-rich environments like coastal areas.
Protective films should remain indefinitelyFalse
Temporary protective films degrade under UV exposure and must be removed promptly after installation to prevent adhesive bonding to the steel surface.
Conclusion
Mastering the use of No. 4 brushed stainless steel hinges on informed selection, precise installation, and diligent maintenance. By understanding the interplay of grade, finish, and environment, and by using light and texture intentionally, designers can create beautiful, enduring spaces that truly stand the test of time.
-
Learn how environmental factors dictate the choice between these two grades ↩
-
Understand the importance of MTC for material quality assurance ↩
-
Learn about adhesive types to prevent corrosion and ensure longevity in stainless steel installations ↩
-
Understand the visual impact of consistent grain direction in high-end finishes ↩
-
Discover effective cleaning strategies for common stainless steel maintenance problems ↩
-
Ensure proper cleaning without damage using suitable stainless steel cleaners ↩
-
Explore advanced coatings to extend the longevity of Grade 316 stainless steel ↩
-
Understand how environmental factors impact stainless steel durability and required protective measures ↩
Have Questions or Need More Information?
Get in touch with us for personalized assistance and expert advice.
